
Food and family have always been important to me. I hope you will try some of my sister, Tina Gould’s family recipes and be inspired by her thoughts on cooking and baking in our Comfort Foods blog. ❤️Barbara
 Hi everyone! I’m Barbara’s sister, Tina. I’m the middle sister in our family. When Barbara asked me to be a contributor to her page, I was unsure of how this would pan out. But as soon as she said “comfort food”, the mommy/wife/sister/daughter in me woke up. Here’s why I love to bake/cook: The Kitchen is a place where memories happen. When I say the word “kitchen”, I am transported back to a very young age. My sisters and I are in our Grandmother’s restaurant, in the back, where she’s diligently rolling out pie dough to put out the many yummy desserts that will be served up that day. She offers us our own tiny pie tins, some dough and cherry filling. We work our hands into the soft creation, shaping it into an almost perfect circle to cover our tins. We spoon the sweet filling onto our crust, and cut our leftover dough to cover it up before Grammy pops them into the oven. Pies were the mainstay at The Village Treat. And Grammy was “The Piemaker.” And what little girl didn’t have an Easy Bake Oven? I’m sure this marvelous Christmas toy was the making or breaking point in some childrens’ culinary careers. Back home in our own kitchen, there were plenty of cookbooks to look at. How I devoured those pages filled with pictures of delectable cookies, cakes, and casseroles. One of my first memories from the kitchen is, one day, wanting to surprise Mom with a batch of cookies. Except, being the overconfident, naive child that I was, I decided to make up my own recipe. When Mom got home, I was pulling out a tray of rock hard lumps and trying to quickly hide them from her! After that, Cookbooks were my best friends!
April 11, 2017 – Creamy Italian Noodles
 I wanted to get this out before Easter time because it’s a flavorful change from potatoes that goes really well with a ham dinner. I found this little recipe many, many years ago in a Taste of Home magazine. I cut it out, taped it onto an index card and it went into my recipe box. That was how we did it back then wasn’t it? Before Pinterest and Google? I can remember sitting waiting in the doctor’s office and flipping through a magazine, and copying a recipe onto scrap paper from my pocketbook. There were plenty of those in my recipe box too.
This one has survived the test of time because Adam still asks for it. I made it last week for him. It’s only 5 ingredients but it tastes like a million bucks.
Creamy Italian Noodles
- 8 oz wide egg noodles
- 1/4 c butter or margarine softened
- 1/2 c whipping cream, half & half or evaporated milk
- 1/4 c grated Parmesan cheese
- 2 1/4 tsp dry Italian salad dressing mix (Good Seasons)
Cook noodles according to package. Drain and place back into pan to mix. Toss with butter. Add the remaining ingredients and mix well. Pour into serving bowl.
This makes 4-6 servings.
How easy was that? I hope you give it a try. Does anyone still subscribe to Taste of Home?
Till next time friends, Happy Holidays from my kitchen to yours!
Tina
March 29, 2017 – Everything But The Kitchen Sink Beans
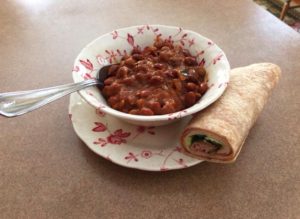 When I first looked at this recipe for Beans I thought, there’s everything but the kitchen sink in these beans! And then, YUM!! I added and omitted some ingredients and fried the kielbasa before adding it into the crock pot. The end result would be a perfect accompaniment to a meal of ham, or hot dogs on the grill. Of course if you lived in our house you’d most likely see a bowl of them and nothing else on the table! We love beans here. The nice thing is that you can choose any and all the kinds you want. They’re heartier than regular baked beans and with the bacon and kielbasa they really could be a meal by themselves. So look in your pantry and see if you’ve got the ingredients to make Everything But The Kitchen Sink Beans for supper tonight!
You’ll need:
- 5 15 oz cans of assorted beans ~ I used light kidney, pink, chick peas, and butter beans. It’s really what I had on hand.
- 1 medium onion, diced
- 1/2 cup your favorite barbecue sauce
- 3/4 cup ketchup
- 1 tblsp Worcestershire Sauce
- 1 tblsp spicy mustard
- 1 tsp chili powder
- 1 tblsp apple cider vinegar
- 1/2 cup maple syrup
- 1/4 cup dark molasses
- 1 can chicken broth
- 1/2 lb bacon
- 2 lbs favorite kielbasa
Pour all of the ingredients into the crock pot and stir till blended. Dice the bacon and fry. I like it extra crisp and almost dark so the flavor stands out and it’s not chewy.
Stir the bacon into the crock pot.
Cut the kielbasa into slices and fry right in the bacon grease. Lay kielbasa over the top of the beans.
Cover and cook on low for 6-8 hours. Cooking them on low for longer allows them to get thicker. If you don’t have the time you can cook them on high for 3-4 hours.
I’ve made these in the middle of the summer and the winter. Last week was Amanda’s Birthday and she requested burgers on the grill and everything else for her special dinner. So we had burgers and hot dogs, Tuna-Mac, Broccolini salad, and EBTKS Beans!
And of course, Red Velvet Ice Cream Cake. It was a very delicious birthday indeed!
I hope you all enjoy your kitchen as much as I do ~
Tina
February 21, 2017 – Whiskey Cake
How many days till Spring?
Really though, it’s not that bad here in Connecticut. We’ve had a lovely spell of temps in the high 50’s and to low 60’s for a few days now and we sure are enjoying it! For those folks up in Maine (my sister included) they’ve had to put up with a lot more snow than we have this winter. But with a few more days of this all of the white stuff out there will be just a memory. Mother Nature has let us off easy the last couple of years and I’m not complaining. One or two major snowstorms a season is about all we can handle now!
I was looking through pictures in my food album and although I thought I was finished with holiday recipes for this year ~ this one got a second look from me. It’s a beauty to look at, is scrumptious, and can be enjoyed any time of year. I’m surprised no one has requested it for their birthday cake yet…
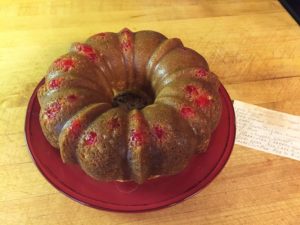 It’s my mother in law’s family famous Whiskey Cake. I say famous because it’s well loved and expected at every Christmas table. Many years ago Mom Gould hand-wrote little recipe file booklets of her favorites for Jamie and me. This is the one tradition that I uphold in her honor – it’s on our Christmas table every year.
So although the Winter holidays have come and gone for another year, there’s really no right time or occasion for this favorite dessert.
Mom Gould’s Whiskey Cake
Preheat oven to 350* and grease a Bundt pan.
You will need:
- 1 box (Duncan Heinz) Pineapple Supreme cake mix
- 1 small package instant vanilla pudding
- 4 eggs
- 1/2 c vegetable oil
- 1 cup whole milk
- 1/2 cup chopped walnuts
- 18 maraschino cherries, cut in half
Topping to be poured over warm cake ~
Melt 1/4 cup of butter, 1/4 cup of sugar and 1/4 cup of whiskey till clear.
Beat the eggs and add the cake mix, pudding and oil and milk beating for 2 minutes. Stir in nuts. Line the halved cherries along the bottom of the greased pan, and pour the batter in.
Bake for 50-60 minutes or till done by toothpick test. Let cake cool for 15 minutes then turn it out onto a rack. Pour topping over while cake is still warm.
Whatever your celebration I hope you try this cake soon. Hmmm….. Amanda, isn’t your birthday coming up?
Best,
Tina
February 13, 2017 – Kentucky Hot Brown Sandwich
 We’re in the midst of a blizzard here in New England and before the power goes out we’re filling water jugs, doing all of the laundry, and I’m doing some cooking just in case.
Here’s a yummy hot sandwich I stumbled upon on the internet that can be adapted to your liking, but however you happen to put it together I promise it will please. We are lucky to have a gas range and we’ve been known to even fire up the grill on the back deck if we’re hungry enough! A cooler filled with frozen water jugs will keep the necessities cold enough till the power returns, too.
I went into our local grocery store, Big Y, on my way home yesterday and, while it wasn’t too crazy yet, the tension was palpable in the bread and milk aisles! I just needed a few things and got out of there pretty quickly. Funny, you would’ve never guessed yesterday that we’d be knee deep in snow today, as it was 53 degrees at our house. Last night was spent in front of the TV, watching the weather forecast, especially the school closings scrolling along the bottom. There are several teachers in my life including my son, Kyle, and his wife, Amanda. And Adam works for the I.T. Department in our local school system. I couldn’t change the channel until I knew that they’d all be cozy at home like we are today.
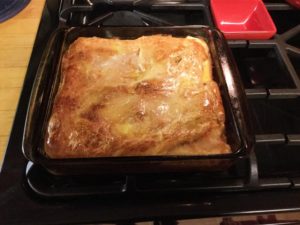
So, whether you’ve lost power in a blizzard or it’s a perfectly lovely day where you are, try this great dish. It’s written for a 9×9″ pan, but if you want leftovers you’d better double it!
Kentucky Hot Brown Sandwich ~ serves 4 (if you’re lucky) ~ Preheat oven to 350* and spray a 9×9″ dish
- 1 roll refrigerated pizza dough
- 1 lb (smoked) turkey lunch meat
- 8 slices cooked crispy bacon
- 8 slices Swiss cheese
- 3 Roma tomatoes slices thin
- 2 eggs beaten
Unroll the pizza dough and cut in half. Place one piece in the bottom of your pan, covering the entire bottom. Layer half of the turkey, bacon, cheese, and all of the tomato. Repeat the layers of turkey, bacon and cheese. Top with the remaining dough. Pour the beaten eggs over the top. Bake for 30 min or till golden brown. Try and let it cool slightly before cutting!
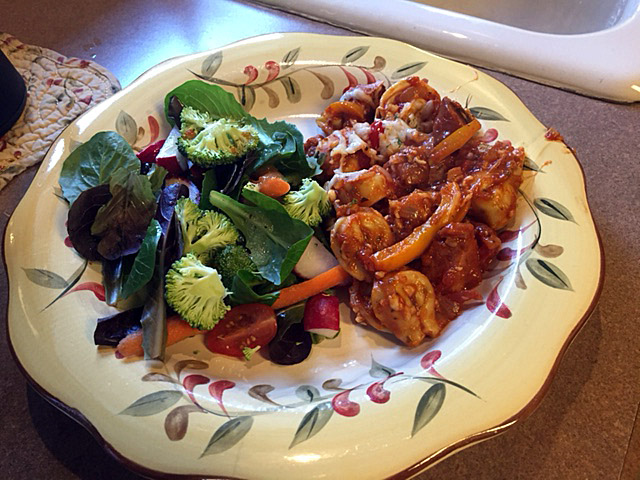
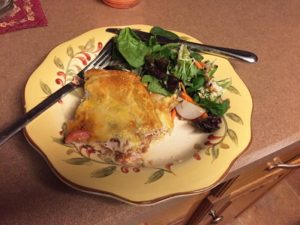 As you can see all we had with it was a salad. It’s very hearty and the saltiness of the turkey and bacon compliment the Swiss cheese nicely. You could use another cheese very easily in place of Swiss, too.
The snow is still falling and the birds are fluttering around the feeder. Maggie May won’t venture out past the porch steps so she’s going to be waiting a long time to do her business!
Happy Snow Day Friends! Tina
January 31, 2017 – Antipasto Skewers
 I want to share with you a really fun and yummy appetizer for your next gathering. I found this on a recipe site and added/omitted some of the things they put on the Skewers to my liking. After building the Skewers, drizzle the balsamic glaze over them and refrigerate to marinate for a few hours or overnight. Serve cold.
I actually made these twice over our holidays and we have a new favorite at our house! They even introduced me to a new friend.. when I asked the deli manager at our local Stop and Shop to cut my Genoa thick for me I had to explain why! She was so intrigued that I decided I’d take a picture and bring it in to her the next time I came in. Kathy and I are fast friends sharing recipes and our love for cooking. How cool is that?!
Antipasto Skewers
Assemble the ingredients and have your short wooden skewers ready.
- Artichoke hearts in the jar
- Genoa salami cut thick to cube
- Cherry tomatoes
- Mozzarella balls from the olive bar
- Pitted Kalamata olives or any of your favorite items from the bar
- Fresh basil leaves cut small enough to fit between
- Frozen or fresh cheese tortellini cooked about 2-3 minutes and cooled
For the glaze:
Boil down 1/2 of an 8 oz bottle of balsamic vinegar and a heaping tablespoon of sugar till syrupy enough to drizzle over the Skewers.
I hope you try these and would love to see pictures of how you build your own.
Fun in the kitchen never ends!
Tina
December 20, 2016 – Cranberry Chip Cookies
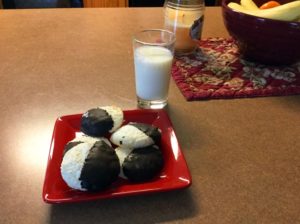
 I chose Cranberry Chip Cookies for my second installment to the Christmas Cookie series. Unlike Chocolate Dipped Macaroons, this is a new addition to the holiday baskets and dessert table. I wanted a change from the traditional Chocolate Chip while still using the basic recipe. Instead of chocolate chips I used dried julienned cranberries and kept the walnuts. I usually do half with and half without for the non-nut lovers. (I can’t believe there are some!) I happen to think they look a bit more festive too. Here goes!
Cranberry Chip Cookies
- 1/2 cup butter at room temperature
- 1/4 cup granulated sugar
- 1/2 cup brown sugar
- 1 large egg at room temperature
- 1/2 tsp vanilla extract
- 1 1/8 cups flour
- 1/2 tsp salt
- 1/2 tsp baking soda
- 1 1/2 cups dried baking cranberries- chopped or julienned
- 1/2 cup white chocolate chips
Preheat oven to 375* and spray cookie sheets.
Stir flour, salt and baking soda together and set aside. Cream butter with a mixer, add the sugars and beat till light and fluffy. Add the egg and vanilla and beat well. Slowly add the flour mixture in and blend well. Stir in the cranberries and walnuts.
 Drop onto cookie sheets, leaving space between as they do spread. Bake 8-10 minutes or till golden brown around the edges.
My freezer is filling up with treats now…
Next up – Chewy Date Nut Bars!
Till next time,
Tina
December 12, 2016 – Chocolate Dipped Macaroons
So I was kind of talked into blogging a Christmas Cookie series by my sister and WildesArt founder, Barbara Hengstenberg. At Thanksgiving time we got talking about the holidays and baking cookies, and she decided that it was what I would do. ?
I am excited about it because I am going to be spending a lot of time in the kitchen baking cookies and bars anyway, so why not share with you? I make about 6-8 different kinds and freeze them until a few days before Christmas when I put them into baskets and deliver them to friends and neighbors. Of course some of them will be saved for our dessert table after Christmas dinner. I just love arranging and displaying them on platters and in the baskets. I’m reminded of when our Mom would call and ask us girls to make a certain kind or two to add to her dessert table for Christmas at their house. All of these cookies were and are still enjoyed by us, our children, and now their children. Our favorites remain ~ those special, yummy treats that we helped Mom roll and cut while waiting, waiting, waiting for them to come out of the oven. The aromas were incredible! When I bake now I can recreate that very special part of my childhood.
I’d love to share some of the old, and new favorites with all of you!
 I’m starting with Chocolate Dipped Macaroons.
This recipe was on the bag of Baker’s Coconut many years ago. I cut it out and in it went with the rest of my favorites into the little file box of “Desserts”. It’s taped onto an index card and has yellowed over time but the finished product never changes.
- Preheat oven to 325*
- 14 oz bag of flaked coconut
- 2/3 cup sugar
- 6 Tblsp flour
- 1/4 tsp salt
- 4 egg whites
- 1 tsp almond extract
- 8 squares of semi sweet baking chocolate melted
Mix coconut, sugar, flour and salt in a large bowl. Stir in egg whites and almond extract until well blended. Drop spoonfuls onto greased and floured baking sheet. Bake at 325* for 20 minutes or till edges are golden brown. Remove to wire rack immediately and cool completely. Melt down the chocolate and dip cookies half way, placing carefully back on rack. Let cookies stand till cooled or refrigerate.
These freeze well. However, if they stay on your counter for too long there won’t be any to freeze. They’re decadent and very fancy looking, but so simple!
I’d love to hear about some of your favorite, tried and true cookies. Ones that you bake every year and have kept in the family to share.
Tina
November 6, 2016 – Fiesta Chicken Surprise
 Once in a while David will just come up with a recipe to try, right out of his head. He’ll get an idea, put it together, imagine what it will taste and look like, and presto! I write it down and try it out.
This one involves chicken, obviously. I’ve added “Fiesta” because it reminds me of a party, and the “Surprise” comes from the ingredient that really did surprise me! His vision did turn out amazingly tasty. Ready?
Preheat oven to 350*
- 4-6 boneless chicken breasts, pounded slightly
- 1-2 cups of flour
- 4-5 eggs beaten
- A big bag of ….. Doritos!!! (Surprise!!) finely crushed. (He put them into a large ziplock bag and rolled our marble rolling pin over them until they resembled fine breadcrumbs.)
- Salsa
- Grated Mexican or Monterey Jack cheese
Put the flour, beaten eggs, and crushed Doritos into separate containers. I always use my round cake pans because they’re just the right size for dredging and dipping cutlets.
In that order, coat each cutlet with flour, dip and coat in the beaten eggs, and then roll around in the Doritos till all covered.
Fry them in a 1/4 cup of Canola Oil just for a couple of minutes on each side. I had two cast iron skillets going at once to save time. Transfer them to a baking sheet and finish them in a 350* oven for 20 min or till they reach an internal temperature of 165*.
While still hot, spoon salsa and add some shredded cheese over the cutlets, and stick back into the oven for 5 minutes or till cheese is bubbly and melty. These were sooo good! The Doritos weren’t overpowering but the flavor did come through and tease the old tastebuds!
I served this with rice pilaf and a green salad. There’s not much that I don’t serve with a salad I guess! You could also spoon some black beans or whatever kind you like over or along side the chicken. Mmmmm…. why didn’t I think of that before? Next time for sure.
Our next Family Dinner is in a couple of weeks. Adam and Brooke, Amanda and Ollie, (Kyle will be in New Jersey at the Marching Band National Championship ~ they won State Champs!!) and we will miss him ~ and David and I. And we’ll miss Jake and his Mommas ~ Jamie and Mel in Tampa too. We have to wait till January to see them… thank goodness for FaceTime is all I can say. I’m pretty certain this will be the main course though. Once it’s been approved by the chief cook and bottle washer it’s ready for guests right?
My next post will surely involve Thanksgiving. It’s hard to imagine that’s right around the corner, but today is November 1st, and I’ve got to get going on my menu and shopping list. And I’m finally going to bring Mom’s good china up from storage to use. It will be really special. We are looking forward and very excited for our North Carolina family to be coming for an extended visit! In case you haven’t heard, they’re WildesArt!!
Till next time,
I’ll be cooking up a storm, how about you?
Tina
October 25, 2016 – Meatball Casserole
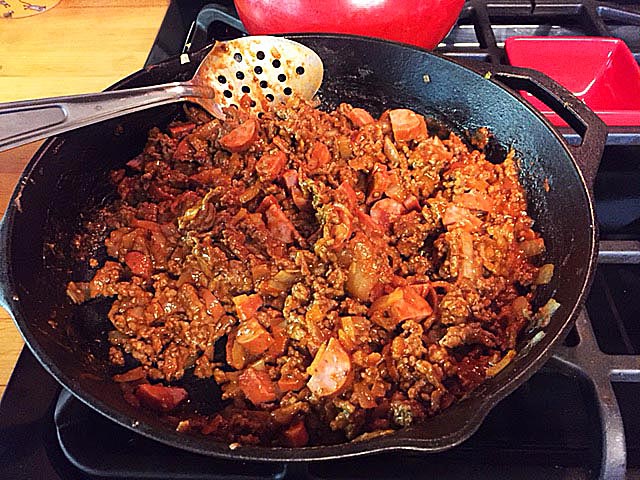
My goodness it’s been a little while since I’ve blogged, but it doesn’t mean I haven’t been in the kitchen! I was in Florida with Jake and his Mommas in the middle of October, and was much too busy playing with that adorable 13 month old little boy to be thinking about Comfort Food. But I’m back and ready to start sharing some of my favorites with you again. I do need to borrow one of Jamie’s recipes for White Chili ? and Chicken Soup to share at a later time, but for today I have a delicious 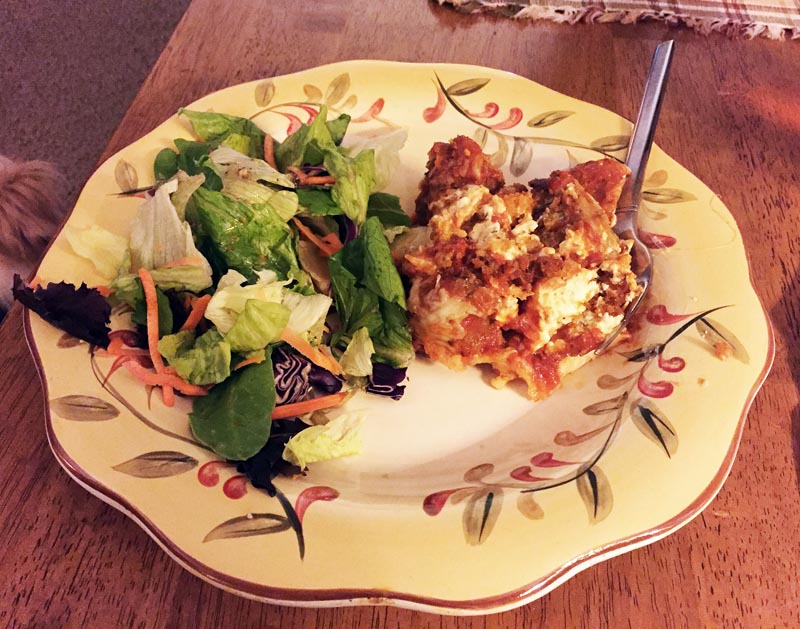 Fall casserole that is sure to please those hearty appetites we all have from time to time. It makes a 9×13 pan, but I made it in 2 8×8’s and stuck one in the freezer for David while I was away. He made out pretty well actually with the freezer meals I left for him. So if it’s a big recipe, divide it into two pans. This one I baked before I froze it and he thawed it to reheat. How nice is it to come home after work or a day away and remember that there’s a meal in the freezer all ready to go?
Meatball Casserole
For the meatballs – prepare 1″ balls and bake at 400* for 15-20 minutes. Remove and set aside.
- 1 lb ground beef
- 1 egg
- 1/3 cup scallions chopped
- 1/4 cup breadcrumbs – you can use either regular or Panko
- 3 Tblsp grated Parmesan cheese
For the Casserole
- 5 oz bag of Italian style croutons
- 1 8 oz package or tub of cream cheese, softened
- 1/2 cup mayonnaise
- 1 tsp Italian seasoning
- 1/2 tsp garlic powder
- 1/4 tsp ground red pepper
- 2 1/2 cups shredded mozzarella cheese, divided
- 1/2 cup Parmesan cheese, divided
- 1 28 oz jar marinara sauce
- 1/4 cup water
Reduce oven temp to 350* when meatballs are done. Pour the croutons into the bottom of your 13×9 (sprayed lightly with Pam) pan. In a bowl combine cream cheese, mayonnaise, Italian seasoning, garlic powder and red pepper. Mix well with wooden spoon till smooth. Spoon the mixture over the croutons. Combine the mozzarella and Parmesan cheeses and sprinkle half over the cream cheese mixture.
Combine marinara sauce with the 1/4 cup of water in another bowl. Add the meatballs and toss till coated. Pour this over the ingredients in the pan, spreading evenly, and sprinkle the remaining cheese over the top.
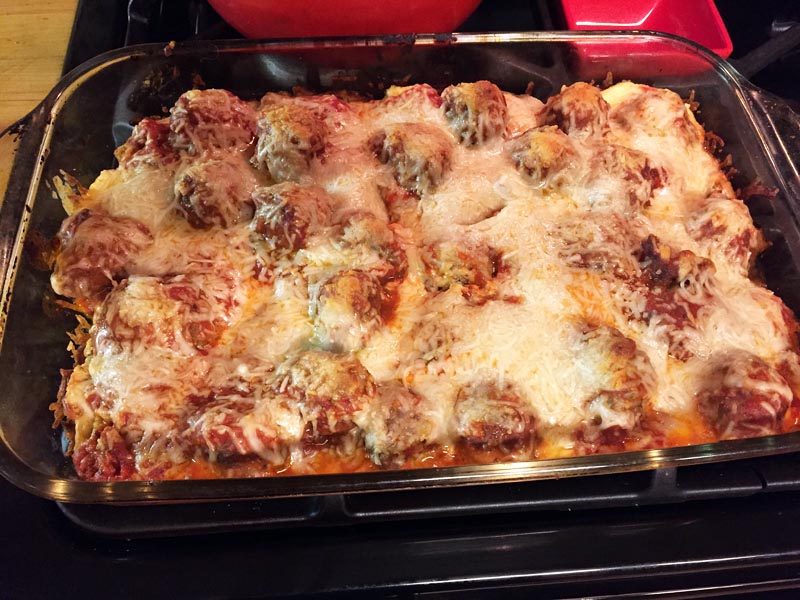 Bake uncovered in the 350* oven about 30 minutes or till cheese is bubbly and melted. If you can wait about 10 minutes to let it set before serving, do so. ☺️
ENJOY! As always, I serve this dish with a green salad and maybe some good bakery rolls.
My hearty casseroles, soups and stews are all going to be making appearances on the table now that cooler weather is here. I’m looking forward to digging in again!
Till next time ~
Remember, making extra for the freezer means you can take that Fall walk in the leaves on another busy day.
Tina
October 3, 2016 – Apple Carrot Walnut Muffins
 Back in the day before computers, when I subscribed to a handful of magazines, there was one in particular that I just loved. Many of you know it too I’m sure – Taste of Home. I would pour through that treasure trove of recipes and pictures, helpful hints and letters to the editor, from cover to cover. Many pages of new favorites to try were dog-eared and eventually cut out and added to my own recipe box. But did I throw the cut up magazine into the recycle bin at that point? Oh no! Because there were still kitchen plans to dream over and the possibility that I’d missed a yummy looking dish that at first glance didn’t catch my eye. Those back issues were a wonderful resource for years until I’d part with them by sharing with a friend. When I mentioned in an earlier post that I never thought I’d rely so greatly on the internet for recipes, this is what I meant. I do miss the feel of the pages in my hand. Turning over the page to explore what was coming next. While you can find just about everything you’d ever need or desire online and it’s certainly better for the environment, nothing will ever replace walking down to the mailbox and feeling the excitement of finding your favorite magazine inside.
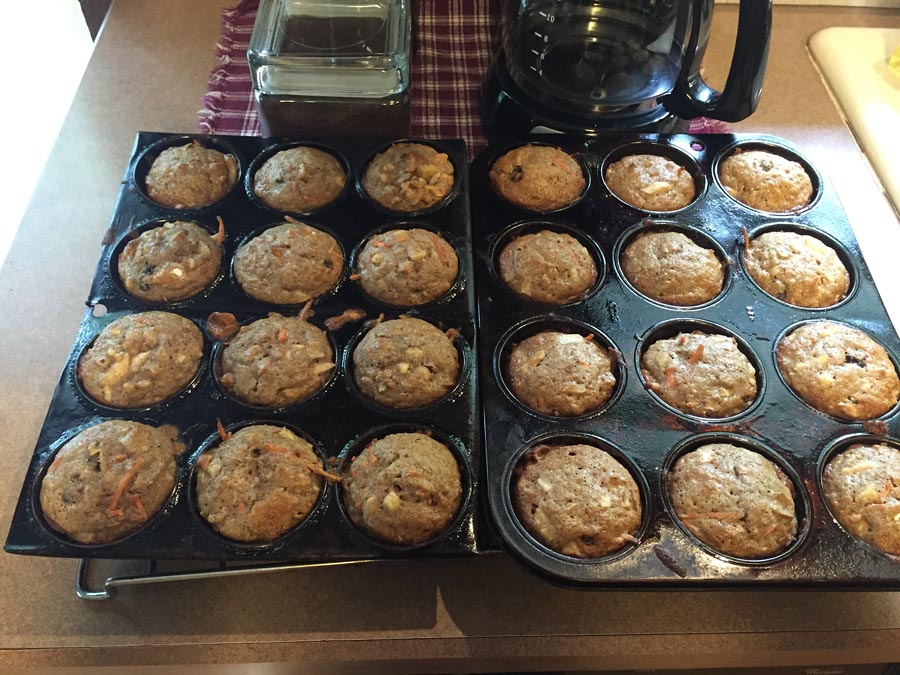
A few weeks ago I posted a picture on Facebook of some muffins that I’d spent the day baking. I received lots of nice comments and even a request to share the recipe. I decided to blog it here so more of you could enjoy them. And it is a Taste of Home recipe, so they get all of the credit here! I cut it out, taped it onto an index card, and years later it’s stained with buttermilk and covered with my notes ? ~ “2/1/04. Delicious! More walnuts.”… It is a family favorite. I made three dozen and packaged and delivered most of them to the kids and neighbors. After sharing David and I were left with 6 muffins that went very quickly! Here it is, for your pleasure..
Apple Carrot Walnut Muffins ~ makes 1 dozen and it’s never enough!
Grease muffin tins and preheat oven to 400*.
- 1 3/4 cup Raisin Bran cereal
- 1 1/4 cup flour
- 3/4 cup sugar
- 1 1/4 tsp baking soda
- 1 tsp ground cinnamon
- 1/4 tsp salt
- 1 egg
- 3/4 cup buttermilk
- 1/4 cup canola oil
- 3/4 cup finely chopped apple ~ I used whatever was in my fridge
- 3/4 cup grated carrots
- 1/4 cup chopped walnuts
 In a bowl, combine the first six dry ingredients. In another bowl beat the eggs, buttermilk and oil. Stir into the dry ingredients just till moistened. Fold in apple, carrots and walnuts.
Fill muffin tins 3/4 full and bake 20-23 minutes or till toothpick comes out clean. Cool and remove to wire rack.
My oven runs hot so they were done sooner. These muffins make your house smell like Fall should! Taste of Home ? is certainly still a favorite of mine. I just dream and plan over a computer screen now.
Till next time,
Tina
September 24, 2016 – Spicy Pulled Chicken over Rice
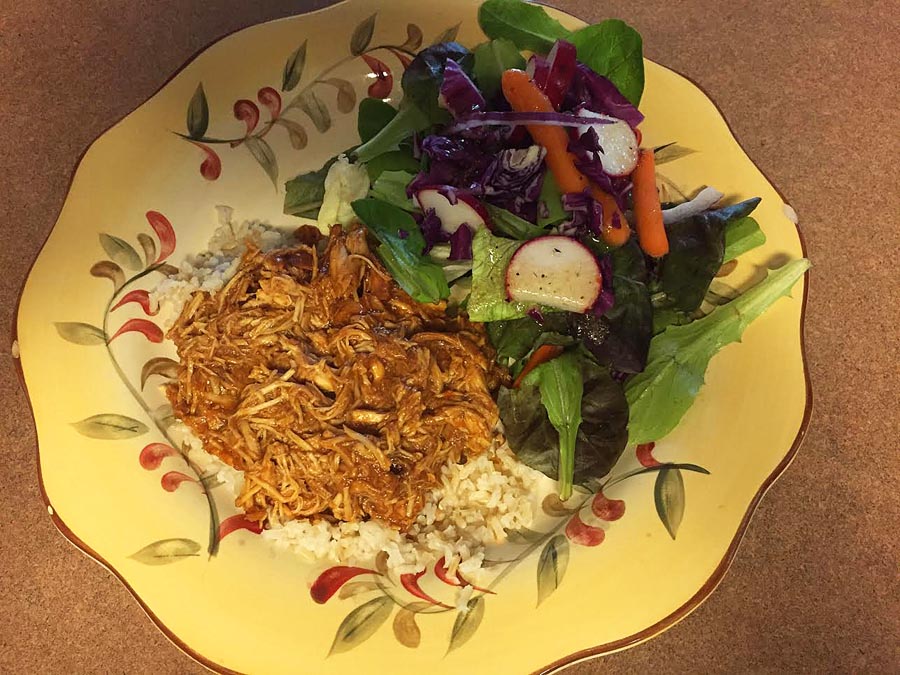 Whenever I find a new recipe I envision it looking exactly as it does in the picture. Then I make it, and sometimes it does, but sometimes it doesn’t. And that’s ok! Well this time the recipe was for Crockpot Chicken slathered in BBQ sauce and a few savory flavors, but when I served it, it was a different meal. A nice surprise! The original recipe was from a blog I follow, and is for BBQ Chicken Breasts . Here’s what started out as theirs, became mine.
Spicy Pulled Chicken over Rice
- 4-6 boneless chicken breasts
- 1 16 bottle of your favorite BBQ sauce
- 1/4 cup cider vinegar
- 1 tsp red pepper flakes
- 1/4 cup brown sugar
- 1 tsp garlic powder
Put the chicken in the crockpot.
Mix everything else together in a bowl and pour it over the breasts. Cook on low 4-6 hours, or until chicken can be shredded with two forks. Continue to shred the chicken, stirring it into the sauce.
Serve over rice.
And that’s it folks!! Oooooh was it good!! There’s just enough red pepper flakes to give it a nice kick, and the brown sugar and garlic compliment the heat.
In my last post I mentioned the return of Fall and the calling for some warm, hearty meals to fill our bellies. Please let me know how you like this one. If there’s any left over, you could even serve in on rolls for a Pulled Chicken Sandwich! Mmmmmmm….. ?
See you next time,
Tina
September 14, 2016 – BLT Pasta
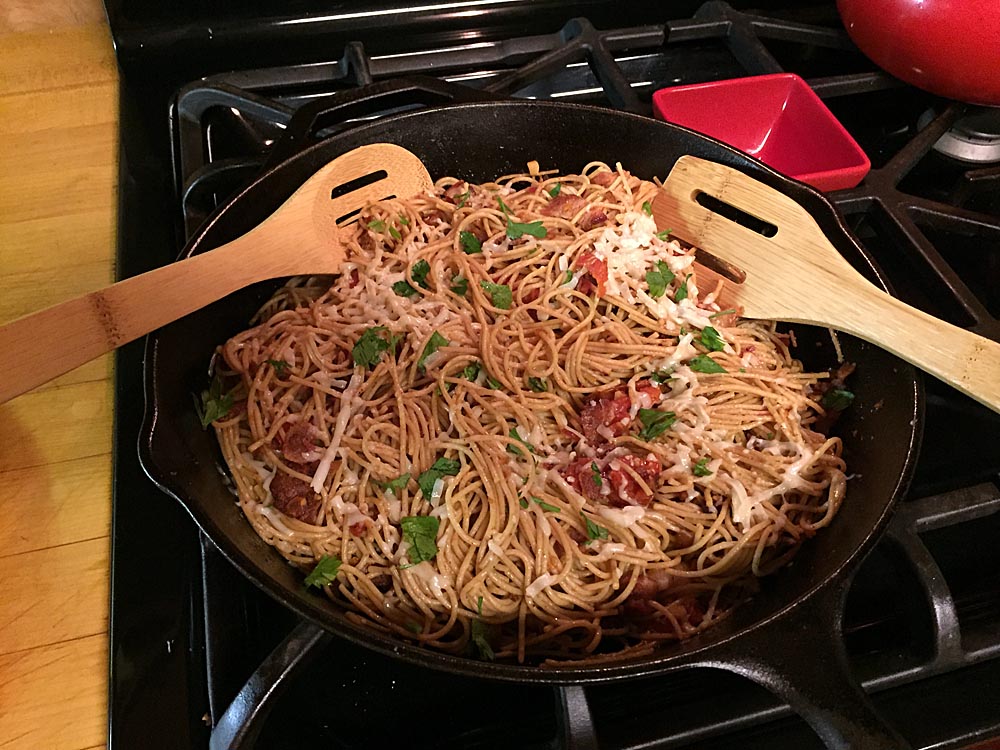 I’m going to start right off the bat with this: BLT here doesn’t mean what you think it does.. It means Bacon, Linguine and Tomato! This skillet supper is so quick and delicious that I’m sure once you’ve made it you’ll be asked to make it again. It’s a favorite with my family now. I served it with a salad and a nice loaf of Italian bread, and everybody was happy. You can use regular, or whole wheat linguine for a heartier taste – which is what I did. Make sure you double the recipe though ~ it makes a great leftover meal when you’re home late or forgot to take something out of the freezer.
You will need:
- 8 oz of preferred linguine
- 8 slices bacon, cooked and chopped to crumble
- 2 plum tomatoes, diced into small pieces
- 2 cloves garlic, minced
- 3 tsp lemon
- 1/2 tsp each salt and pepper
- 4 Tblsp grated Parmesan cheese
- 2 Tblsp fresh minced parsley
Cook pasta and set aside to drain. Meanwhile cook the bacon in a skillet till crisp, remove and set on a paper towel to drain. Reserve 2 Tblsp of the bacon drippings in the pan. In that, sauté the tomato and garlic for 1-2 minutes or till heated through. This will smell amazing! Stir in the crumbled bacon, lemon juice, salt & pepper.
Add the drained linguine to the skillet, sprinkle with cheese and parsley ~ toss and serve.
What could be easier?
With Autumn approaching quickly we’ll be looking for skillet and crock pot meals, as well as soups and stews to fill our bellies and warm our souls. I’ve got some more favorites up my sleeve….
Till next time,
Tina
September 6, 2016 – Reuben Casserole
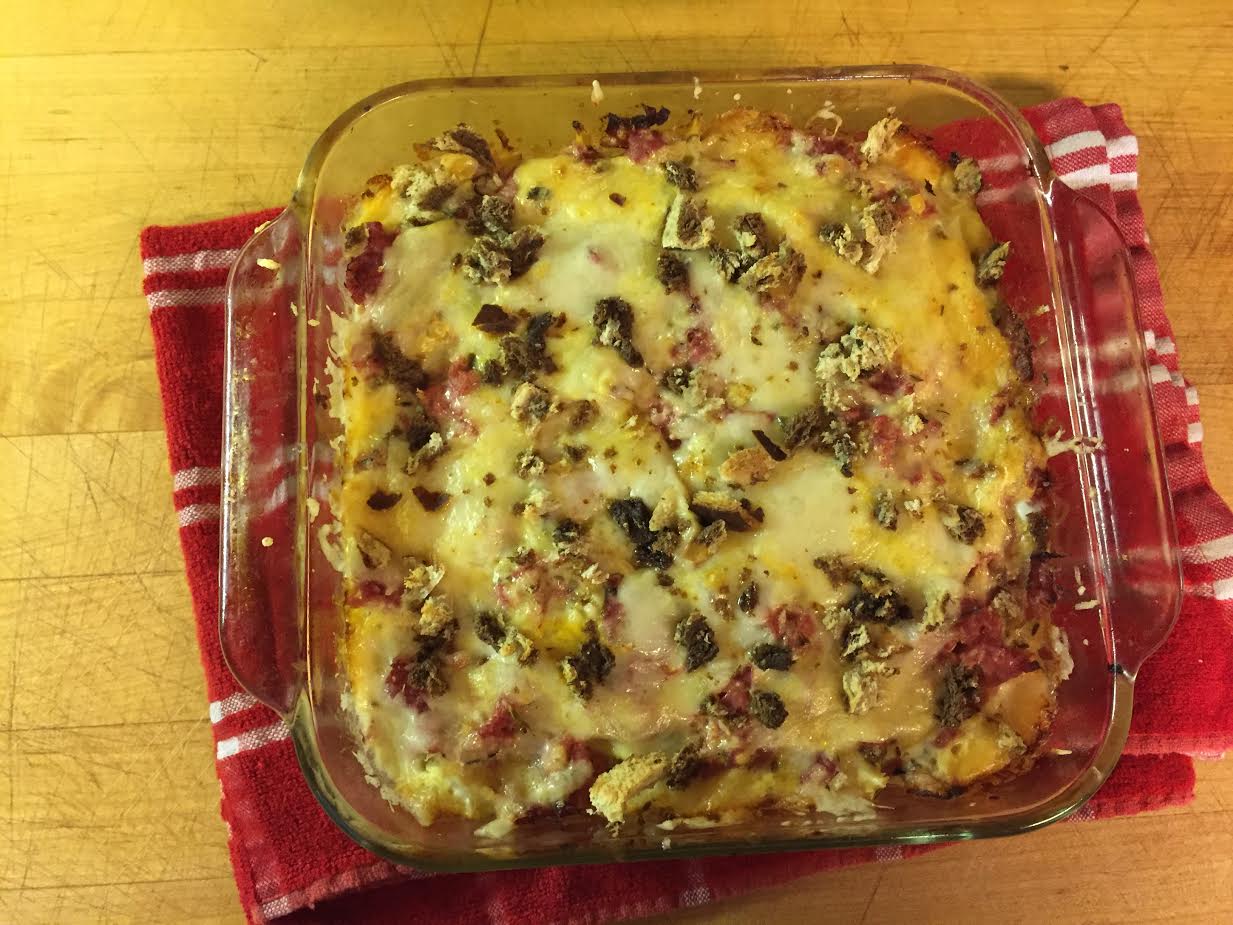 Every once in a while I like to make something for my family that I don’t particularly enjoy. After all, why should they only get to eat what I like? It hardly seems fair! Everyone is especially grateful and that makes it all worth it. This is a recipe I found on a site called Grizzly Fare. So they get all of the credit here. There are so many fantastic food/ cooking sites out there, you hardly need a cookbook anymore. While I do admit to searching online for recipes more than I used to, I haven’t boxed up my cookbooks and sent them down to the basement yet!
Here’s a great one ~ easy to make, and from what I hear, scrumptious!
Reuben Casserole
- 6 slices of rye bread, I used marble
- 1 lb pastrami or corned beef, almost shaved
- 1 14 oz can sauerkraut
- 4 cups shredded Swiss cheese
- 1 cup chopped dill pickle
- 1 cup milk
- 1/3 cup Thousand Island dressing
- 1/4 cup mustard
- 3 large eggs
- 2 tsp caraway seeds
Preheat oven to 350*. Lightly grease a 9×13 baking dish.
Cube 4 slices of the bread and spread them on the bottom of the dish. With the other slices you can put them into a food processor until they’re crumbs, or I just chopped them really fine and kind of crumbled them with my hands. Set aside.
Over the cubes layer 1/2 of the pastrami, top with sauerkraut, pickles, 1/2 of the seeds and 2 cups of the cheese. Layer the remaining pastrami, seeds and cheese over that.
Whisk together milk, dressing, mustard, and beat in the eggs. Pour over wet casserole.
Top with remaining bread crumbs. Bake at 350* for 40-45 min or till bubbly on top and set in the middle.
Cooking is one sure fire way to show someone you love them. Tune in next time for more hugs and kisses from the kitchen!
Tina
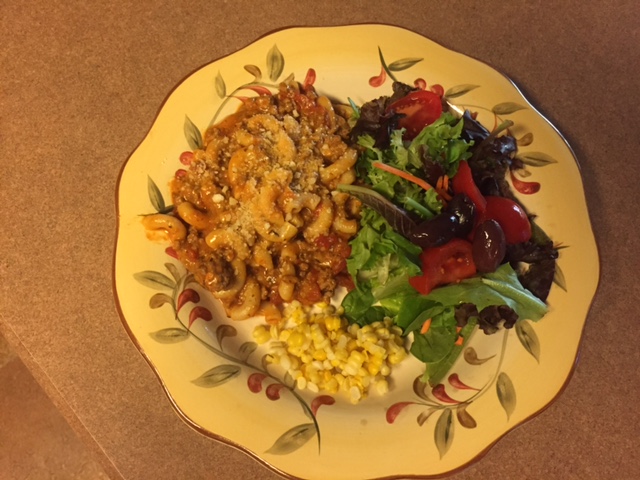
September 1, 2016 – Better Than Hamburger Helper Goulash!
 It’s been a fun, busy summer that’s flying by way too fast. We’ve had our days of HHH (hazy, hot and humid) here in Connecticut and not enough rain. I’ve spent less time in my gardens than I’d like and more time inside cooking and reading…. Isn’t that a good thing?
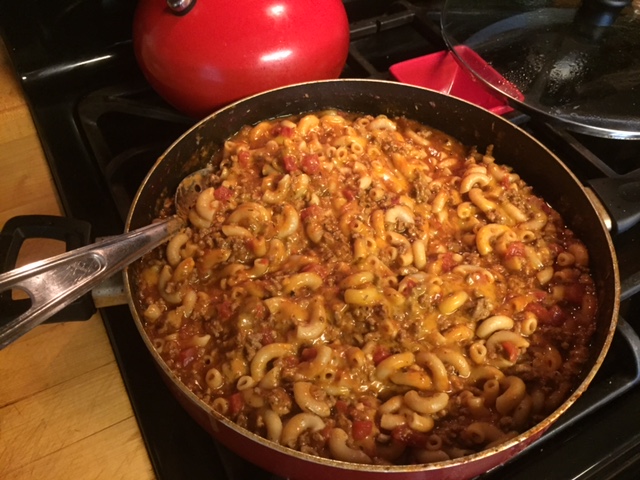
When there’s a good friend or neighbor in need, its a natural instinct to step up with some comforting things. I have recipe upon recipe to choose from, but what’s most appreciated during a troubling time is pure and simple comfort food. For me, pasta comes to mind first. But the thought of heating up the kitchen in this weather doesn’t excite me. I’ve come up with my own version of a stove top pasta casserole. When I was whipping it up I couldn’t stop thinking about Hamburger Helper! I tried it a couple of times when the kids were little and it was fine. It passed the test! But when you have more time to spend on a dish for a friend in need the love that goes into the act is well worth it.
Here’s my yummy, lovely pasta dish that really is….
Better Than Hamburger Helper Goulash!
- 2 lbs ground beef
- 1 tsp Adobo or seasoned salt
- 3 tsp minced garlic
- 3 c water
- 2 15 oz cans tomato sauce
- 2 15 oz cans diced tomatoes
- 1 tsp red pepper flakes
- 2 tbsp Italian seasoning
- 3 tbsp steak or Worcester sauce
- 2 c elbow macaroni, uncooked
- Shredded cheddar cheese
 Brown the beef in skillet with adobo. Drain. Add garlic and sauté for 4-5 minutes.
Add water, tomatoes, seasonings and Worcestershire sauce. Cover and simmer for 15-20 minutes.
Add the uncooked elbows, stir in well, cover and simmer for 30 minutes or till most of the liquid is absorbed. Cover the casserole with cheddar cheese right before serving.
I hope you try this, whether it’s for your own supper or for a friend in need. Just don’t forget to transfer it out of the skillet and into a covered dish!
Till next time,
Happy Cooking!
Tina
July 11, 2016 – Mom’s Chocolate Crinkles
We’re Outta Here!!
Jakob and his Mommas will be here in two more days and then the caravan will hit the road! We go to Southern Maine so it’s a quick three hour trip. The coastline is glorious ~ and with eight of us and the two bundles of boy this year we’re sure to make this a memorable week. We’ve been making memories at Wells Beach for four generations now, starting when I as a girl and Mom and Dad would bring my sisters and I on a one week vacation to the shore. As we grew up, I brought David with me and it wasn’t long before we started to bring our three little ones. When Kyle proposed to Amanda on the very beach where David carried him on his back every morning to look for sand dollars, history repeated itself when Ollie came along. And of course Jamie will have Jake there this year. Adam’s girlfriend Brooke is joining us too, and who knows? I’d say that this is a pretty special place for our family.
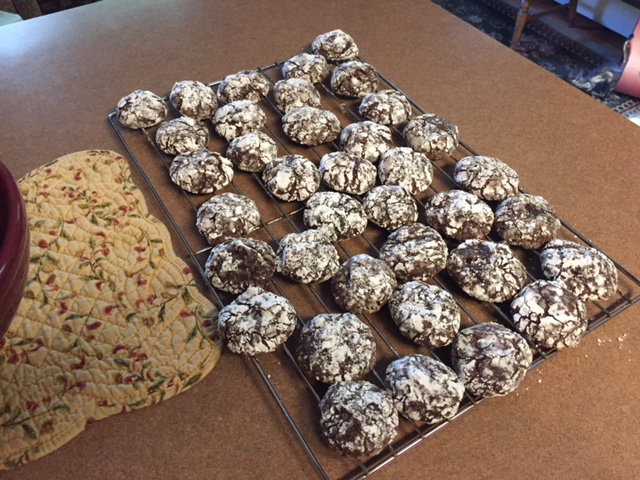 When we were little girls my Mom had this humongous gold tin that we’d pack with the assortment of cookies and bars we’d been baking and freezing for weeks, to take along with us. I remember Congo Bars, Peanut Blossoms, Date-Nut Pinwheels, and so many more. But one of our favorites was Chocolate Pixies. Mom called them Chocolate Crinkles and I can see why. I baked them yesterday and they’re in my freezer now. I’ll make another kind as well, and Jamie is baking and bringing her sweet treats too. While we don’t have that big gold tin, we do have the memories of it…. taking the top off to find the layers of confections, wax paper separating each kind, wanting to dig to the bottom to see what we’d get tomorrow! This tradition lives on, down through the generations just as I’m sure Mom dreamed it would. Oh I wish I knew where that gold tin was…..
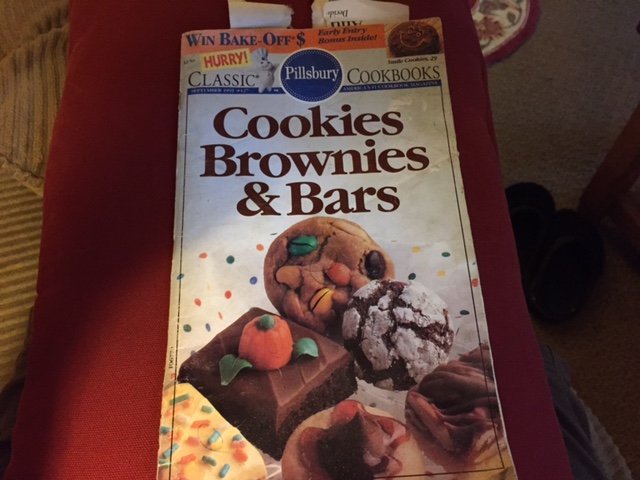 This is a recipe from one of those Pillsbury Classic cookbooks you’d find at the checkout in the grocery store. The price on it is $2.50 and the copyright says 1991! I can’t count the number of times it’s been opened up on my kitchen counter in the last 25 years. Not a thing was altered today. If I had chocolate chips I might have add a cup to the batter, but you don’t normally mess with Pillsbury! I do think that in order to eat these cookies a glass of cold milk is quite necessary though; Mmmmmmmm…. My mouth is watering….. Enjoy!
Pillsbury’s Chocolate Pixie ~ or… Mom’s Chocolate Crinkles
- 1/4 cup butter or margarine
- 4 oz (squares) baking chocolate
- 2 cups flour
- 2 cups sugar
- 1/2 cup chopped walnuts or pecans
- 2 tsp baking powder
- 1/2 tsp salt
- 4 eggs
- Powdered sugar
Melt the butter and chocolate in a saucepan over low heat, stirring constantly till smooth. Remove from heat and cool slightly. Stir in flour, sugar, walnuts, baking powder, salt and eggs and mix well. Cover with plastic wrap and refrigerate for at least an hour for easy handling.
Heat oven to 300*. Roll dough into 1″ balls and roll in powdered sugar to cover. Place on a greased cookie sheet for 12-15 minutes or till set. Remove right away to a cooling rack.
These cookies are super chewy and chocolatey. I remember baking them the night before the first day of school one year to pack in our lunch bags and Dad’s “Dinner Bucket”. Food and recipes conjure up such special memories for me. Do you have a favorite food or recipe that brings you back to a special time and place? I’d love for you to share.
See you all after vacation!
Tina
July 2, 2016 – Cowboy Casserole
 It’s summer! Schools are out, the kids are home, and many of you are looking for an easy and yummy supper to put together after you’re all home from your warm-weather activities. This is also great as leftovers so make sure to make the full recipe which is a 9×13″ pan. If turning on the oven doesn’t thrill you when it’s warm out, save this for another day. But it only takes a good 15 minutes to bake so it’s not on all that long. When I put it together I couldn’t help but think of a bunch of Cowboys sitting around the campfire eating their grub after a kind hard day! I’m not sure why because this doesn’t even have beans in it – ( aren’t they a staple for Cowboys?!) You could add a can of drained pinto or kidney beans… Hey, I think I just created a new recipe! See how that happens?
I hope your “Cowboys” enjoy this dish!
Cowboy Casserole
- 1 yellow onion diced
- 1 lb ground beef
- 1/2 tsp salt
- 1/2 tsp pepper
- 1/2 cup tomato sauce
- 1/2 cup ketchup
- 2 1/2 tsp chili powder
- 1/2 tsp sugar
- 10 hot dogs, or any sausage you like – I used kielbasa dogs- yum!
- 1 package (10) Hungry Jack or Pillsbury regular dinner biscuits
- 4 tablespoons butter melted
- 1/2 tsp garlic powder
- 2 tablespoons dried parsley
- 2 cups shredded cheddar cheese
Heat the oven to 350* and grease a 9×13″ baking dish.
 In a skillet cook the onions in a pat of butter till softened. Add the ground beef, salt and pepper, crumbling the beef with the onions till cooked thoroughly. Add the tomato sauce, ketchup, sugar and chili powder, bringing to a boil. Reduce heat and simmer for 10 minutes. Remove from heat and set aside.
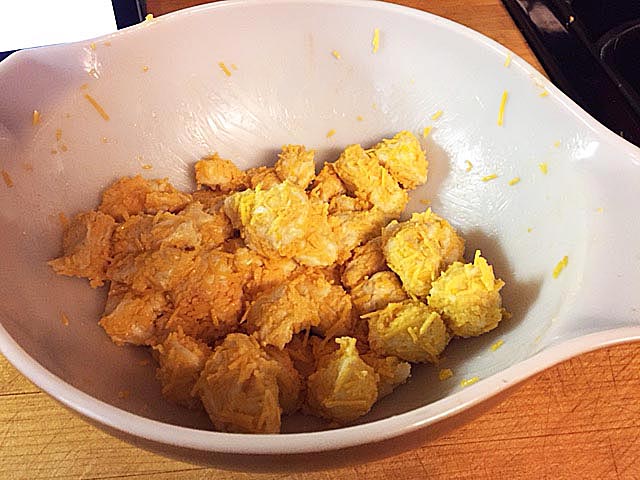 Chop the hot dogs into bite sized pieces, set aside. Take each biscuit and cut into 6 pieces. Place them in a bowl. Make sure all of the pieces are the same size so they’ll cook evenly. Mix the butter, garlic powder, parsley and cheddar cheese and pour over the biscuits, tossing gently with your hands to coat all of the pieces.
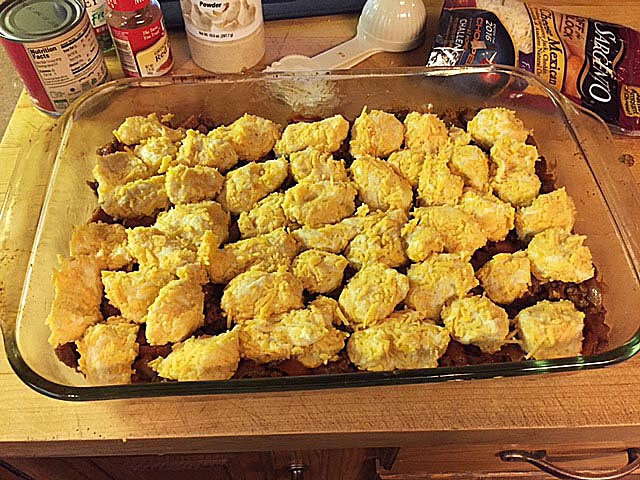 Layer the ground beef mixture and hot dogs into the greased pan. Place the biscuits over the top, spreading evenly. Bake for 15 minutes or until the biscuits are golden brown. Mmmmmmm goodness!
Quick and delicious. If your day is crazy put it together in the morning or even the night before and cover it before sticking it in the fridge. I learned that trick many years ago while running between swim lessons, play dates with friends, and packing for camp. I’m well past those days now, but will always treasure them. I’m thinking this may be my make-ahead supper to throw in after a day at the beach. Which is where we will all be for a week in July! It’s a nice change from BBQ’s. I’ll save those recipes for another day…
Happiness is sharing your dinner table with family and friends. Spend the time with them instead of in the kitchen!
Happy Summer ~
Tina
June 11, 2015 – Asian Noodle Salad
Memorial Day weekend has come and gone, and we had a wonderful day with our “Connecticut kids!” We missed Jamie, Mel and Jake this time, but will see them in July for a family vacation. Jamie and I are saving and sharing recipes to take to the beach and dazzle the family!
 For our last cook-out we wanted something besides the usual (but still yummy!) Potato or Mac salad and coleslaw. As I’m always searching for new recipes to try, and David is home and loves a challenge, we took a recipe we found and simplified and put a spin on it to better fit our taste buds. It was a hit and will definitely be on our table again this summer. Here is ~ Asian Noodle Salad ~ Gould Style
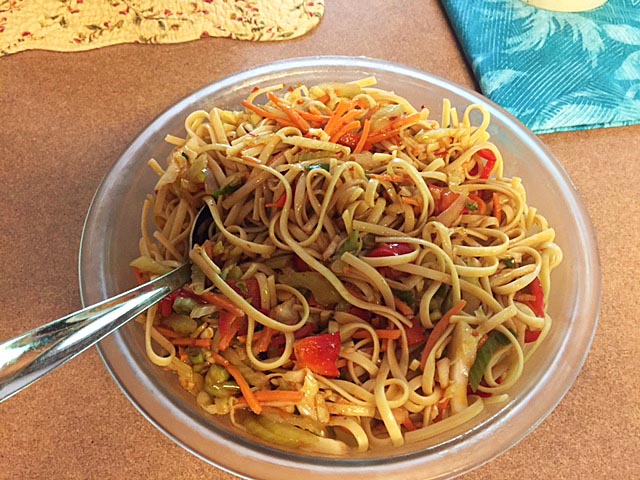
Asian Noodle Salad
- 8 oz box linguine
- 1 teaspoon sesame oil
- 2 tablespoons rice wine vinegar
- 3 tablespoons soy sauce
- 1 teaspoon chili garlic sauce
- 1 tablespoon hoisin sauce
- 1 tablespoon brown sugar
- 6 tablespoons extra-virgin olive oil
- 1 cup julienne carrots
- 3 celery stalks, thinly sliced or julienned
- 6 green onions, thinly sliced
- 1 cup thinly sliced cabbage
- 1/2 red bell pepper, thinly sliced or julienned
- 3 tablespoons toasted sesame seeds
1. Cook and drain well linguine. Cool.
2. Sautee for only 2 minutes carrots, red pepper, celery and cabbage in 2 tablespoons of olive oil.
3. Mix together sesame oil, rice wine vinegar, soy sauce, chili garlic sauce, brown sugar and remaining
four tablespoons of olive oil.
4. Combine cooled linguine with sauce mixture and green onions.
5. Top with toasted sesame seeds.
It’s a cold salad, and was the perfect side to our Teriyaki Beef (May 29, 2015) – and green salad.
There’s always an excuse for a cookout isn’t there? Keep a lookout for new recipes to try – and remember, recipes are just a guide, not the rule. Have fun!
Tina and David
May 30, 2016 – Dave’s Rigatoni Pie
Summer is right around the corner… according to the calendar. But here in Eastern Connecticut we’ve been in the middle of a heat wave this week. The weather forecasters call it “The Three H’s ~ Hazy, Hot, and Humid.” Summer means something different for everybody ~ for us it means David’s on vacation!! We are fortunate enough to enjoy the summer months together doing things we both like to do: taking long walks, catching up on Netflix series, ( yes, binge-ing), and cooking! We will have the Connecticut kids over Sunday for a little BBQ to start off the season right. And we’ll both be in the kitchen preparing our feast.
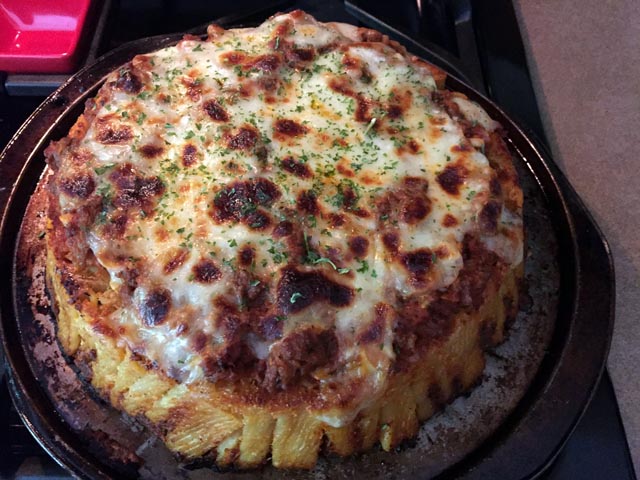
 But on Monday of this week my Hubby made THE most tasty, unusual pasta bake I’ve ever seen. We found a recipe on Facebook and he took one look and said he had to try it. Of course he put his own spin on it and after all was said and done, he named it Dave’s Rigatoni Pie. It’s a bit labor intensive, but it’s a labor of love. Here’s a great way to show someone you love them! I must say it took 4 hands to get through a part of it, but doesn’t that make serving it all the more special?
Dave’s Rigatoni Pie:
A Springform pan is really the way to go with this dish. If you don’t have one you can use any deep round pan you have. Grease it well because you will be turning it out onto a plate, if you’re not using a Springform pan.
- 16 oz longer rigatoni ( when I shopped I discovered there is a shorter one too!) Also, Barilla still gives you 16 oz. Many kinds are only 13.5 oz now.
- 1 cup grated Parmesan cheese
- 6 oz fresh mozzarella cheese
- 1 lb ground beef
- 1 lb hot sausage, casing removed
- 1 large Spanish onion ( we like the sweetness of this onion)
- 5 cloves fresh chopped garlic
- 1 tsp regular Adobo seasoning (found in Spanish foods aisle)
- 1/2 tsp onion powder
- 1/2 tsp garlic powder
- 1 tsp chopped dried basil
- Your favorite 26 oz marinara sauce
Cook pasta and drain.
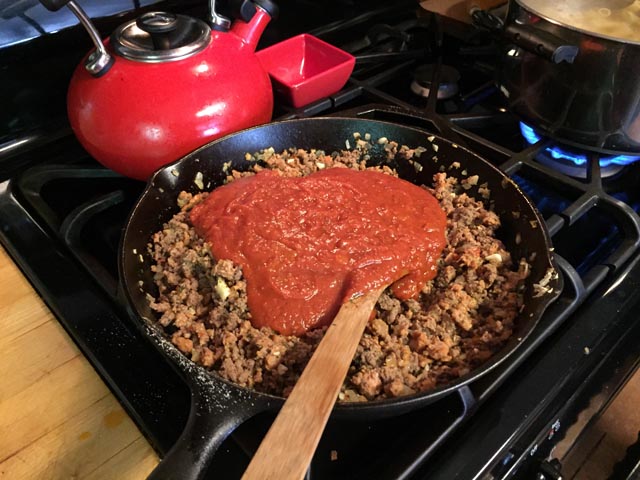 Sauté the meats and break up with your spoon. Spoon off excess fat. Add in the onion and garlic and cook till browned and crumbly. Add seasonings. Let the mixture cool. Break up fine with your fingers. This will make it easier when you’re stuffing the rigatoni. Set aside.
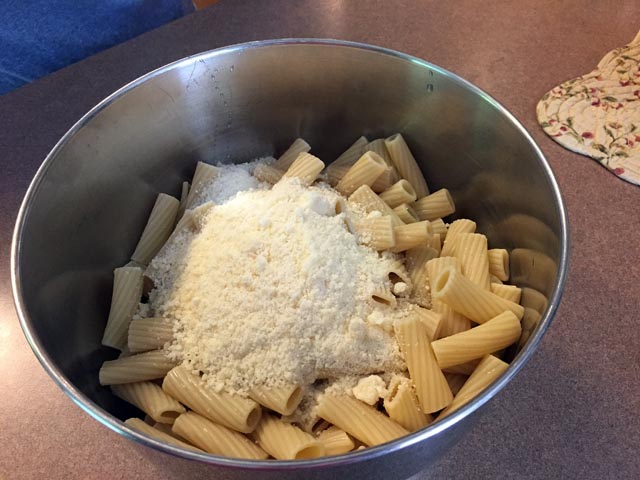 Add the grated cheese to the cooked and drained pasta, mixing well with your hands. Be sure to coat all of the rigatoni well.
 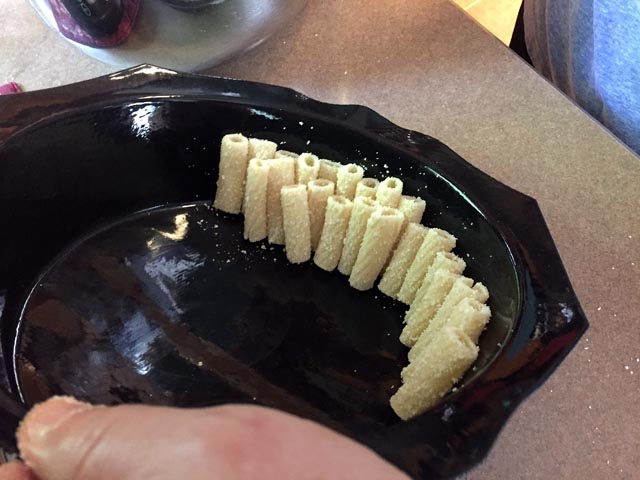 Stand pasta up in your pan starting on the outer edge, going around, and working your way in, till the pan is full. (This is where it took more hands. You have to tip the pan a bit to keep them standing until it gets full.)
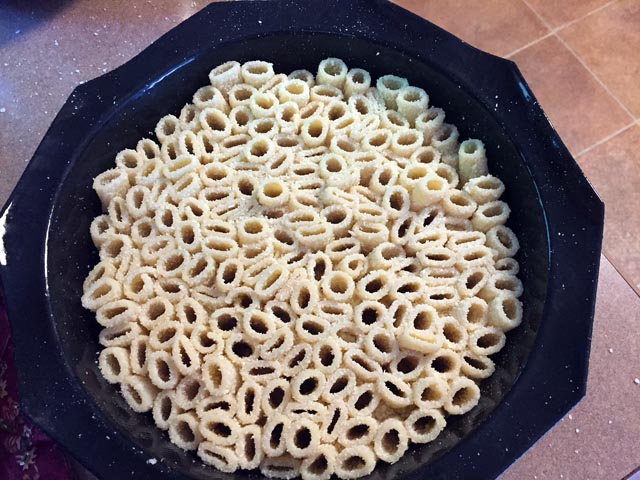 When pan is filled with little rigatoni soldiers, pour the sauce over the upright pasta. If you happen to have a spare chopstick, it’s the perfect size for stuffing the mixture into the pasta.
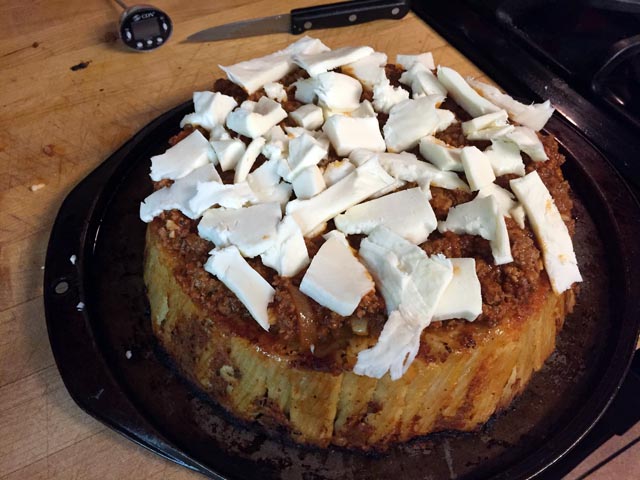
 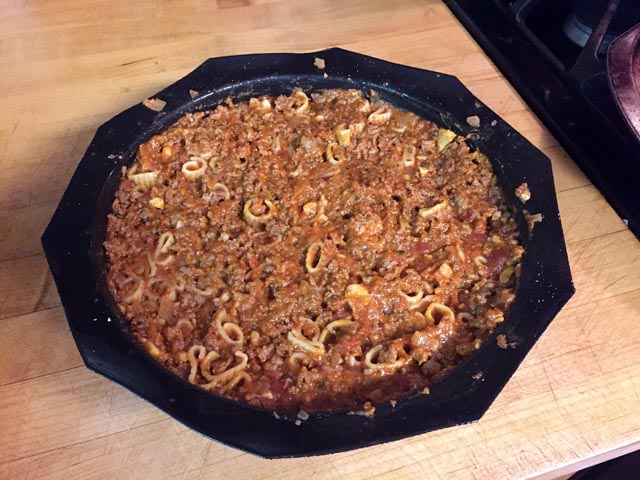 If not, use the round end of a wooden spoon. This takes time. Spread any leftover sauce mixture over the top. Cook at 350* for 20 min., then pull out and place fresh, sliced mozzarella over the top. Put back into the oven for 10-15 min or till cheese is bubbly.
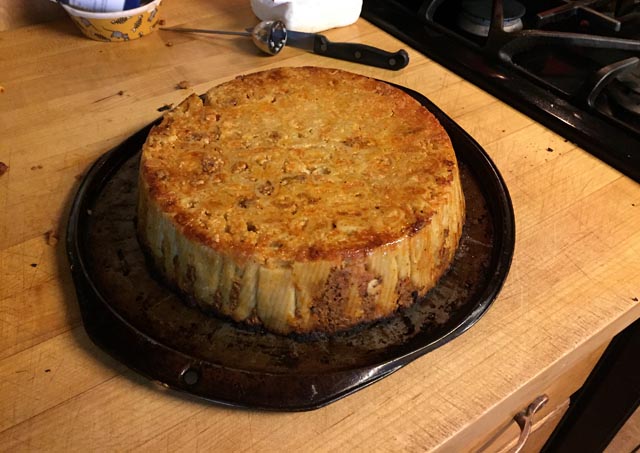 Cool on a rack for 10 min. If you’ve used a regular pan, place a plate over the top and flip it! Remove pan and sprinkle fresh parsley over the top. For Springform pan simply open onto the plate.
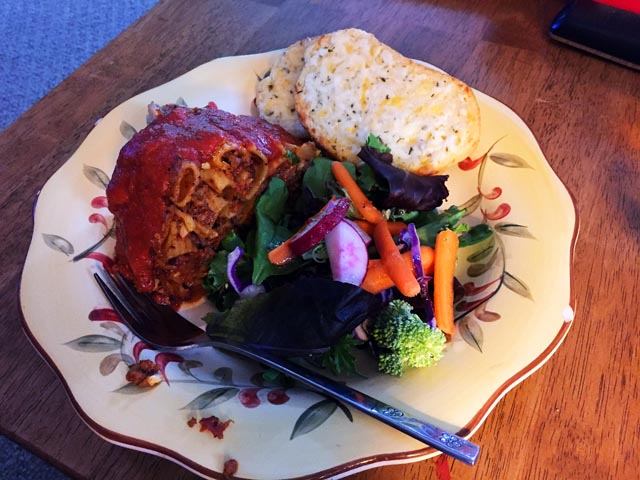
 This was sooooo good friends. It stood up really well and held it’s shape after flipping. We were very pleased with the result. Cut it like a cake or pie, and have some extra warmed up sauce and Parmesan cheese on the side.
 We hope you try this tasty treat! It’s a great one to bring to a pot luck. I served it with green salad and Texas Toast! Yum yum!
Till next time,
From my kitchen to yours,
Tina
May 14, 2016 – Chicken Chimichangas
We have a favorite Mexican restaurant that we frequent two or three times a year. I always order their Chimichangas – sometimes chicken, sometimes beef. While enjoying them during our last visit, I mentioned to David that there must be a recipe somewhere for my favorite Mexican dish, and that when I found it I’d make it even better. Here was a new challenge!
To perfect a recipe in your own kitchen is not only satisfying, but adds another layer to your recipe box. If you’re someone who loves to entertain it’s nice to have a multitude of recipes at your fingertips. I spend many hours simply reading, researching, and collecting recipes to putter with; some work out and others don’t. If one makes it to the table, my first question after we’re finished is, “Well, is it a keeper?” Most of the time we’re all in agreement, but sometimes majority rules! If they like it, the recipe I’ve tweaked goes into my box and stays there on file until I decide that it fits into a menu for supper at home, or a potluck with friends.
 Chicken Chimichangas PlateSearching for and perfecting recipes in my kitchen is my passion. What’s perfect for me may not be for the next guy though, and that’s what’s so great about cooking. Cookbooks are not rule books. Take what they give you and “doctor it up” as Mom used to tell us.
Here are my “Doctored Up” Baked Chicken Chimichangas:
- 2 cups cooked and shredded chicken ( here’s another instance to buy the cooked rotisserie chickens at the supermarket)
- 1 cup salsa
- 1 15 oz can of pink beans, rinsed and drained (use any kind of beans you like)
- 1/2 tsp dried oregano leaves, crushed
- 1 tsp ground cumin
- 1 cup shredded cheddar cheese
- 2 green onions (scallions) chopped (about 1/4 cup)
- Six 8″ tortillas
- Melted butter to brush over the tops
- Diced tomato, sour cream, olives, shredded cheese, guacamole, and anything else you like for toppings
 Chicken Chimichangas StartPreheat oven to 400*
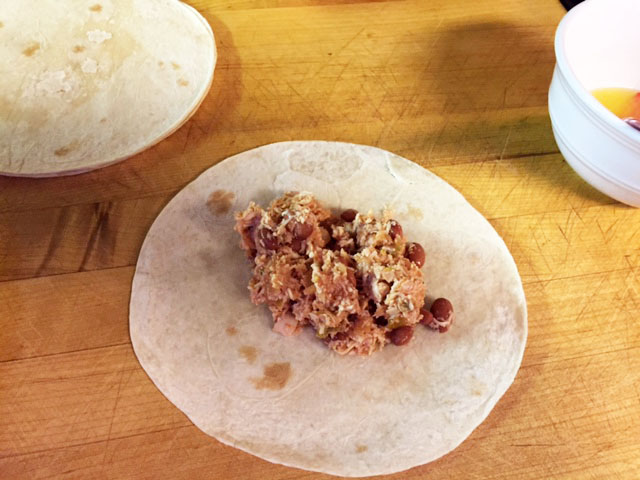
Mix chicken, salsa, oregano, cumin, beans, cheese, and scallions in a bowl. Place about 1/3 cup in the center of each tortilla, folding the sides over and rolling up the ends. Place them seam side down in on a sprayed baking sheet.
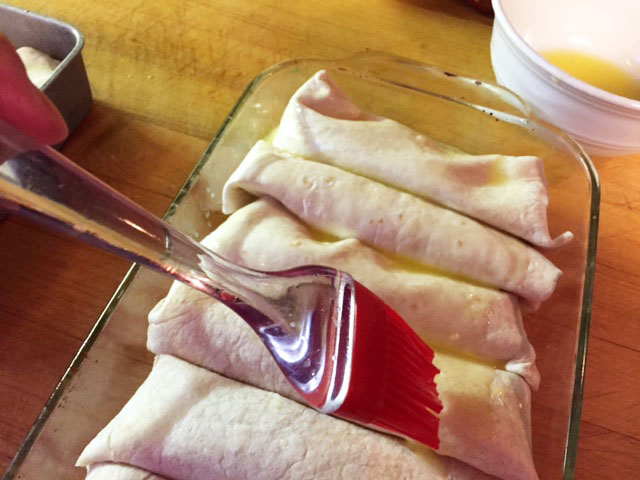 Chicken Chimichangas PanBrush with melted butter.
Bake at 400*, uncovered, for 25 min or till golden brown and crispy.
Garnish with toppings.
I’m always interested to see how you Doctor Up your recipes. This is a good one to double because they’re small enough to eat two! I served them with yellow rice and a green salad, to round out the meal. It’s fun to go out and get Mexican, but how easy are these?
I hope you get the chance to try them and they make it into your “favorites”.
Till next time,
If your kitchen keeps you happy, stay there a little longer. You never know what you’ll come up with!
Tina
April 26, 2016 – Sausage Tortellini Skillet
Hi everyone!
I’ve been on hiatus ~ I spent a week in Tampa with Jake and his Moms! I came home with a head cold that I gave to all of them and left them with…. ( I blame the plane!) They’re coming up in July for a wedding and then the whole clan is traveling to Southern Maine for a week at the beach. We can’t wait! But I couldn’t wait another three months to see my Nugget so David gave me an early birthday and Mother’s Day gift. I also got to go see my favorite band in the world ~ Pearl Jam, with Melanie. What a show! It was a wonderful trip with the added joy of spending time with Aunt Mary in Clearwater. We sure do have fun.
 Before I left I made sure to cook up and freeze some meals that David and Adam could warm up for suppers. Not that they’re helpless in any way, I just feel better doing it. And, it’s something to share with you!
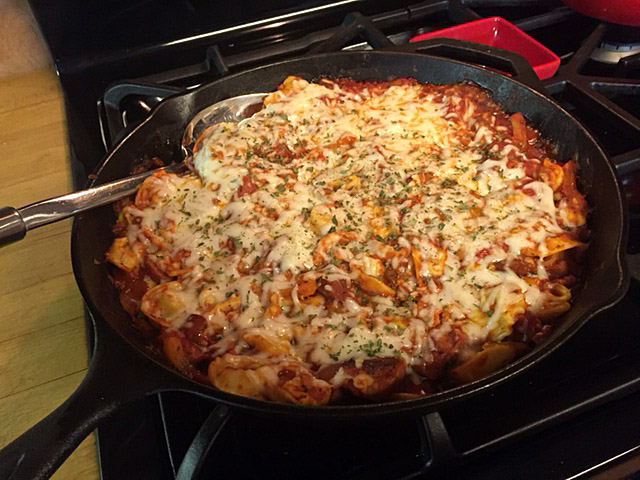
This is normally prepared and baked right in the cast iron skillet, so I divided it up into two containers and froze one. I hope you try it!
Sausage Tortellini Skillet
You need:
- 1 smoked sausage, sliced into 1/4″ diagonals
- 3-4 cloves minced garlic
- 1 onion, rough chopped
- 1 bell pepper of your choice, sliced into thin strips ( I like the tri colored, not a fan of green)
- 12 oz frozen cheese tortellini
- 1 tsp dried oregano
- 24 oz marinara sauce
- 2 cups shredded mozzarella cheese
- Scallions for the top
Preheat oven to 350 degrees. Heat a 12″ cast iron skillet to medium-high heat and stir fry the sausage till browned. ( I always spray the pan first). Add the garlic, onions, and pepper and stir on lower heat till veggies are soft. Stir in COOKED tortellini, oregano, sauce, and 1 cup of the cheese. Top with the remaining cheese and bake in 350 oven till cheese is bubbly and melted. Sprinkle with scallions if desired.
 This is a really hearty dish. Perfect with a salad and bread. Best part? They hadn’t used the frozen one so we had it the other night. Mmmm….. Yum!
Till next time,
Keep cooking, there’s no better way to share your love with those you love.
Tina
March 30, 2016 – Macaroni and Cheese
Hi friends!
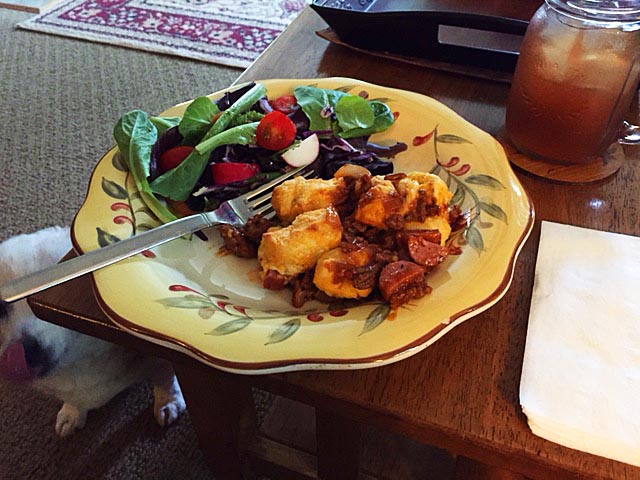
Yesterday was Easter Sunday and while my table was missing some loved ones, the few of us who were here enjoyed each other’s company, conversation and laughter, and of course ~ food! Jamie and Mel have started their own tradition with Jake in Florida, playing Easter Bunny and creating their own menu. I really need to start asking her for some of her recipes (many original) to share with you. Just hearing about “Irish Soda Bread, Twice Baked Potatoes, and Strawberry/Blueberry Shortcake”…… Well I know that my love of everything Kitchen has passed on to her! ( the boys love to cook also, and are quite good at it!) The word is that Jake is experimenting with some solids now, and he got to try some ham and potato yesterday. He’s liked everything they’ve offered him. Being 7 months old must be very exciting! I wonder if he had dessert…..
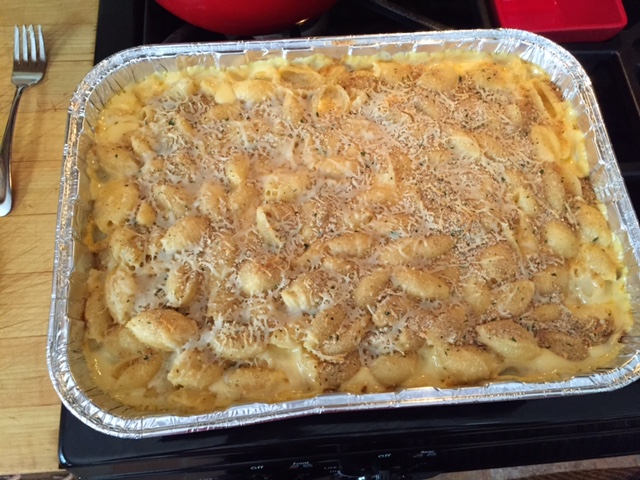
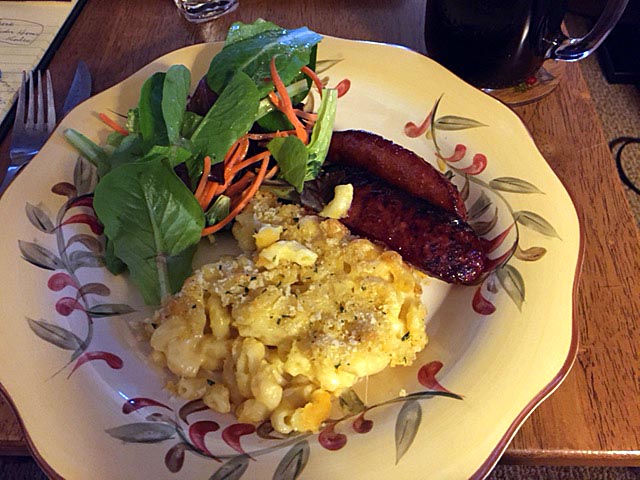 My accompaniment to our ham wasn’t potatoes, for the first time. I’ve made Macaroni and Cheese a couple of times in the past month for friends in need, and after giving it all away, I decided I really wanted some! (Hence the picture of it with kielbasa). So we had it with our Spiral Ham yesterday. My recipe is tried and true. So easy you won’t believe it. It makes a 9×13 baking dish but with my boys here, it doesn’t last long! I believe I found the recipe on the side of a Stop and Shop macaroni box about 15 years ago. I’ve fiddled with it and got it just the way we like it. I hope you do too!
Macaroni and Cheese:
- 3 tablespoons butter
- 3 tablespoons flour
- 2 cups whole milk
- 1 1/4 tsp Adobo all purpose seasoning (found in the Spanish section at Stop and Shop)
- 1 1/4 tsp dried minced onion
- Panko bread crumbs
Now, for the cheese… You’re going to need about 1 1/4 lbs total. Use whatever you like, or have on hand. I usually use two 8 oz bags of shredded cheddar, Colby Jack, or the like. This time I also had a block of American on hand that I cubed up so I threw that in as well. When you’re stirring to mix it keep adding more to your liking.
 While cooking the elbows as directed, start making the cheese sauce. Add back to the pan after draining so as to add the cheese mixture to it later.
Melt butter in a saucepan, stir in flour till smooth. Cook, stirring over low heat till smooth, about 2-3 minutes. Add the milk in gradually, stirring the whole while, till smooth. Add the cheese, stirring till mixed in. Transfer to a buttered baking dish, sprinkle generously with Panko crumbs. Bake in a preheated 350* oven for 25-30 minutes or till bubbly and turning brown on the edges.
I hope you all had as joyous an Easter Day with your family and friends as I did. Hmmmmm….. Next holiday? Memorial Day? Picnic food!!!!
Till then,
Keep cooking,
Tina
March 14, 2016 – Chicken with Tomatoes and Olives
Spring is in the air! The days are longer ~ the air is warmer, and if you look closely you might just find a bit of green poking up out of the ground towards the sunshine.
Spring is a good time to start sharing some of the lighter meals I have from my recipe box. The heavy soups and casseroles that we crave in the colder months can be replaced with some simpler fare. With more sunlight now, who wants to be stuck cleaning up the kitchen when we could be taking a walk after supper?
 My recipe this week is Chicken with Tomatoes and Olives. You’ll marinate the chicken early in the day, ( or the night before), and simply use one baking sheet to complete this wonderful dish in the oven. I hope you try it!
Makes 4 servings
You will need:
- 1 tsp of Italian seasoning ~ I have McCormick on hand
- 1 tsp of dried oregano leaves
- 1/2 tsp of salt
- 1 large clove of fresh garlic, minced
- 1 lb boneless skinless chicken breasts, cut into large pieces
- 1 pint cherry or grape tomatoes
- 1/2 cup of fresh kalamata olives
- 2 tablespoons olive oil
- 1/4 cup feta cheese crumbled
Mix the dry spices, salt, garlic, and olive oil in a large bowl. Toss in the chicken, tomatoes and olives. Mix till thoroughly coated.
You need to marinate for at least 4-6 hours to let the chicken saturate with the seasonings. I prefer overnight ~ it’s less work the next day too!
Arrange it all on a 9×13 foil lined baking sheet, sprayed lightly with cooking oil. Roast in a preheated 450* oven 20 minutes or till chicken is cooked through. If desired, sprinkle with feta cheese before serving.
Toss a green salad, pick up some bread at the bakery, and in no time at all you’re serving a scrumptious and light supper. Now go for a walk before it gets dark!
Tina
February 25, 2016 – Sweet Raspberry Chocolate Tarts
Hey friends!
February is almost over and today I decided it was time to take the Kissing Balls from the front porch. It’s 59*!! It was a mild winter and they only had two snowstorms to be adorned with snow. Oh they looked pretty. The Christmas wreath is off of the front door, and the “Happy Holidays” flag has been replaced with a more generic winter themed one.
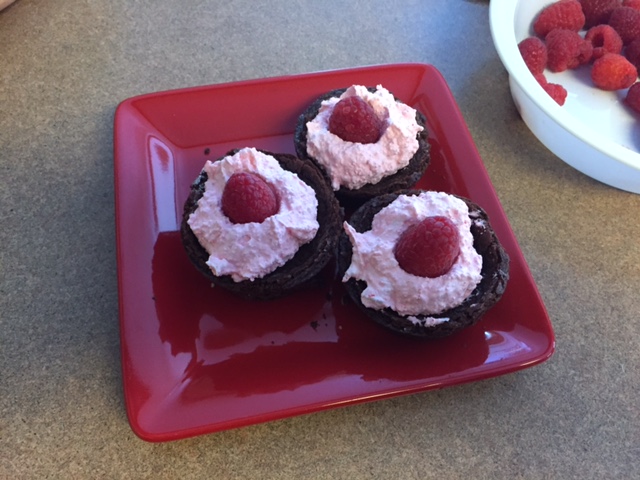
I know Valentine’s Day has come and gone, but I wanted to share with you a sweet treat that I served at last week’s Family Dinner. We were blessed to have Kyle, Amanda, and Ollie ~ and Adam and Brooke at our table. We surely missed Jamie, Mel, and Jake! David and I were a pretty good team in the kitchen last weekend; we made and served Eggplant Parmesan, roasted broccoli, boiled smoked shoulder, salad, and homemade rolls. 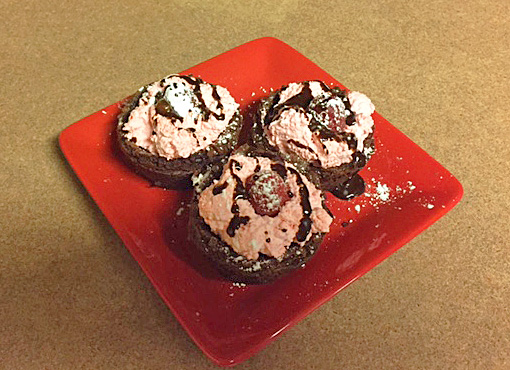 After supper and a bit later when we weren’t so stuffed, I presented each couple with a pretty red plate of Sweet Raspberry Chocolate Tarts. Maybe you could file this away for next year!
Sweet Raspberry Chocolate Tarts:
Make your favorite brownie recipe or use a mix. (I always have a couple of brownie mixes in the pantry. There’s a million things you can use one for.)
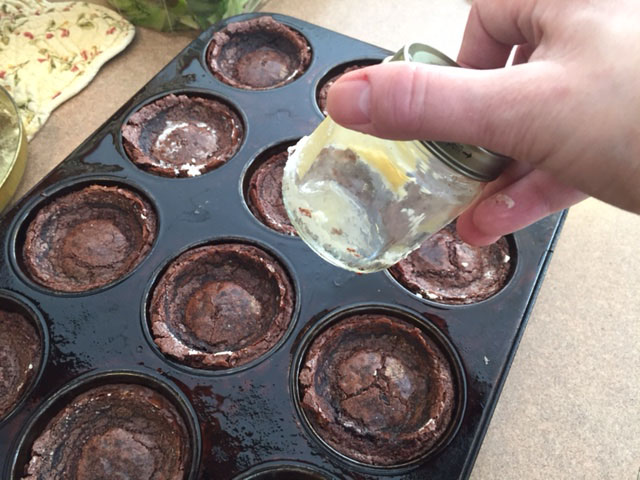 As shown in the picture, as soon as they come out of the oven, use a round shape to make an indentation in each one, as deep as you can. (I found an old baby food jar in the back of a cupboard, it was the perfect size!). Remove them to a cooling rack.
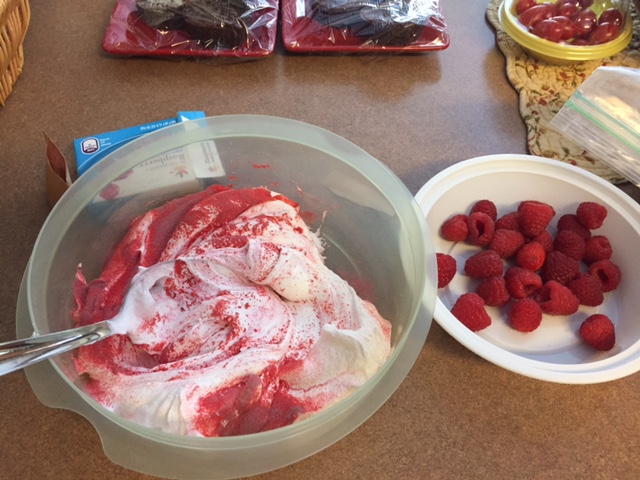
Mix a small box of raspberry (or your choice) jello into a small container of thawed Cool Whip. Spoon some into each “brownie bowl” and top with a fresh raspberry. Dust with sifted powdered sugar and lace with melted chocolate, or chocolate syrup.
The pictures don’t do the actual presentation justice. They were so yummy and cute ~ the perfect ❤️ Day surprise for all of my Sweeties!!!
I’ve been in my kitchen trying out many new recipes that I’ll be sharing in the coming blogs. Right now I’m working on a sugarless, flourless, eggless, (?!) cookie. I’ve mixed up the ingredients and its in the fridge waiting to be baked! I’m so excited!
Happy Cooking and Baking friends!!
Tina
February 10, 2016 – Crockpot Roast
Howdy folks! Here in New England we are paying now for what we were bragging about being an “easy” Winter. Friday’s storm left us with about 10″ and lots of heavy, wet snow which thank goodness didn’t result in loss of power. Many in surrounding towns lost theirs though. It’s the kind of snow that looks like someone threw cotton balls all over the tree branches and they stuck! It’s very beautiful really. But that was Friday and today is Sunday and we’re at 45 degrees right now. Oh, New England!!!
 I can’t take credit for my recipe this week. It’s a crockpot roast that I stumbled upon, and just the perfect dish for a cold winter supper. Talk about easy! I’ve seen it posted in a few different places, and it goes by the name ~ 3 Envelope Roast, as well as ~ The Best Pot Roast Ever! I guess my name for it would be… Crockpot Roast! Hey I can cook, I never said I could write!!!
Crockpot Roast:
- 3 lb beef chuck roast
- 1 envelope dry Italian dressing mix
- 1 envelope dry Ranch dressing mix
- 1 envelope brown gravy mix
- 2 cups water
Sear the roast on all sides. I do mine in straight butter, it turns it a golden brown.
Put the roast into the crockpot. Put the three dry mixes into a 4 cup measure, add 2 cups water to them, and whisk up. Pour this over the roast. Cook on low for 8 hours or on high for 4 hours. Personally, I’ve done it both ways and when I was in a hurry and cooked it the quicker way, it wasn’t as tender. Start it early in the day or as I do sometimes with crockpot meals, put it together the night before and pop it in the fridge till morning.
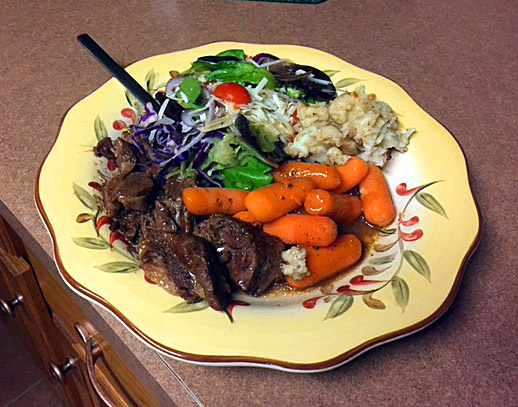
We ate this for days. It’s delicious just as it is served with mashed potatoes to pour the gravy over, cooked carrots and salad. The next day we put the meat into tortillas and warmed them in the microwave. So good!
Till next time, stay warm wherever you are. Jamie reports 50 degrees in Tampa these days… Brrrr!
Tina
January 22, 2016 – Chicken Breast in Tangy Butter Sauce
Hello friends,
It’s good to be back on the scene after my short hiatus from WildesArt. Babies and holidays, family and friends, all wonderful things that get in the way but necessary to keep me fulfilled and on track. While thinking about my blog entry today the idea of beginnings, middles, and ends came to mind. In life there are so many of these. Our lives have them, as a teacher I showed my students that stories had them. Songs have them, and so do recipes.
 So for this recipe I took three pictures, a beginning, a middle and an end. When I cook or bake, the process is always the same; the planning, the process, and the the serving of the final product. I hope this helps you envision and inspires you to try some of my recipes for yourself. This week’s dish is my version of a chicken recipe I found. I call mine Chicken Breast in Tangy Butter Sauce. I swore I would never ever stray from my collection of cookbooks. But that changed when I discovered the Internet! Remember, all it takes to call a recipe your own is a little tweaking – changing an ingredient or two or switching up your methods. And whenever possible use fresh ingredients. It really does make a difference! Look at my beginning, middle and end. Then create your own.
Chicken Breast in Tangy Butter Sauce
- 2 boneless skinless chicken breasts, butterflied
- Enough white flour to dredge the breasts in plus a pinch of adobo all purpose seasoning (or your favorite seasoned salt mixture)
- 3-4 eggs
- A handful of fresh chopped parsley
- 1/2 cup of finely shredded Parmesan cheese
- 1 cup white wine
- 1 cup chicken stock ( or substitute chicken broth here. I did and it was fine)
- 2 fresh garlic cloves chopped fine
- 4 tablespoons olive oil
- 4 tablespoons butter
- Half a fresh lemon
- Salt and pepper
Butterfly the chicken breasts, cover with plastic wrap and flatten with a mallet – set them aside.
Beat the eggs with a pinch each of salt and pepper into a cake pan ( I use one because the chicken breast will need to dip in and coat. Add 3/4 of the chopped parsley and all of the Parmesan cheese to the egg mixture, beating lightly.
Put the flour and Adobo into another pan to dredge the chicken in.
 Over moderate heat, add the olive oil and half of the butter to a deep frying pan. Dredge the chicken in the flour, coating well. Put right into the egg wash mixture, turning over till coated well on both sides. Cook for approximately 4 minutes on each side or till browned. Transfer to a warmed plate ( I stuck a plate in the microwave for two minutes.).
To the same frying pan over full heat, add the chicken stock/wine, crushed garlic, squeeze the lemon, and the remaining parsley and the rest of the butter, reducing for two minutes. Add the chicken back in, stirring and spooning the sauce over it, until desired thickness.
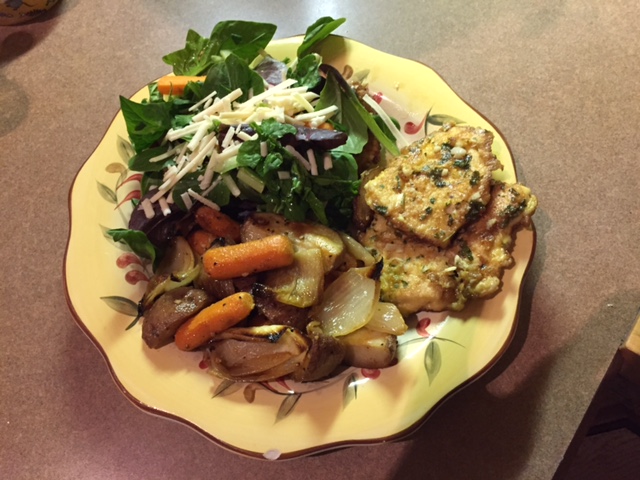 Serve the chicken with the sauce poured over the top. As you can see we had a green salad and roasted vegetables with ours. The planning, process, and and final product led to a very happy ending in my house last night! Rave reviews from David and Adam. I must say myself that it did taste like something off of a menu from a fine restaurant! Here’s to your beginnings, middles and ends…. In the kitchen and out.
Happy eating everyone!
Tina
December 14, 2015 – Pork Ragout
Seasons Greetings friends near and far! 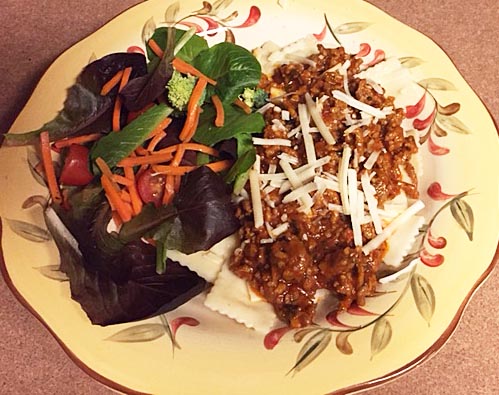 With the holidays quickly approaching, everyone is looking for simple and easy suppers to get onto the table in no time. I came upon this recipe in a magazine and put my own spin on it by making a few changes. It comes together really quickly ~ I started making supper at 4:30 and we were eating by 5:15! It was just David and I, then Adam popped in on his way home from a job, and the pan was empty after he left. I liked the change up to having this sauce over ravioli instead of regular pasta. It added another layer to the flavors. Yum! In fact, I think this will be on the supper table one night in January when our home is filled with Jamie, Mel and Jake ~ and our North Carolina family, Barbara and Bill. Pork Ragu:
- 1 lb of frozen cheese ravioli ( I chose the tiny ones)
- 2 tbsp olive oil
- 1 large garlic clove finely chopped
- 1 lb lean ground pork
- Salt and pepper
- 1/2 c tomato paste
- 3/4 c white wine or chicken broth
- 1/2 – 3/4 c of pasta water
- 1/2 c fresh parsley roughly chopped or 3 tbsp dried
- Grated Parmesan cheese
Cook the pasta according to package, drain and add enough canola oil to keep it from sticking. Reserve the pasta water and set aside. Heat the olive oil and garlic in a large skillet and cook over medium heat till garlic starts to brown. Add the ground pork, season with 1/4 each of salt and pepper. Continue to brown, breaking the pork up with a wooden spoon, 5-6 min. 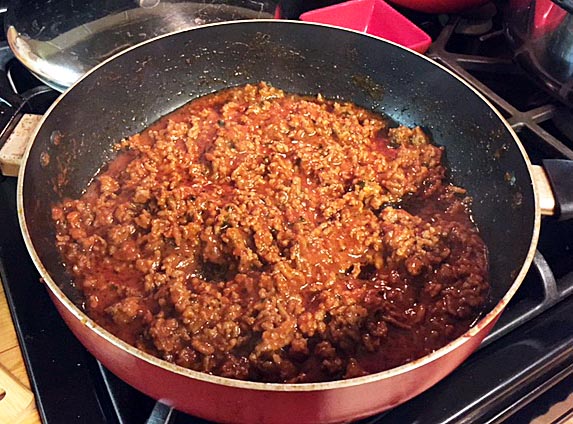 Add the tomato paste and continue to cook, stirring for about 2 minutes. Add the wine and simmer for another minute. Fold in the parsley, and keep stirring in pasta water till it thins out to your liking. Serve this over the ravioli, and top with Parmesan cheese. Sprinkle more parsley over as desired. Do you have a favorite quick and delicious meal to share? I’d love to see some and compare notes sometime! Until next time…
Happy cooking and joyous eating!
Tina
November 9, 2015 – Family Dinner: Savory Chicken Tortellini Soup The calendar says November, but here in Eastern Connecticut you’d never know that Thanksgiving and Christmas are right around the corner. Our daily temperatures have averaged in the High 60’s to low 70’s, and while I’m not complaining, the unseasonable weather makes it difficult to think about those winter holidays that we look forward to because of the big meal and family time. But that’s ok, because here in my house we have Fall Family Dinners as often as we can. Usually on a Sunday evening. We hope everyone can be at the table, but sometimes that’s impossible. I truly love looking over at each of my kids, and David, and listening to the little side conversations as well as joining in on one spirited discussion filled with lots of laughter. There’s always laughter! I think it’s so important that families make time to get together. And not just for the big holidays. As the kids grow up it is harder to get everyone in the same place at the same time, but we have to try. These are the golden times, the memory makers. And while I’m not a fan of cell phones at the table, I have been caught using mine to snap some good pictures now and then!  When I think Fall meals, two words come to mind… Soup, and Crockpot. I’m a big fan of both. Crockpots are great if you’re working of course. There’s nothing like coming home to a warm, delicious smelling kitchen and knowing that your supper is ready to go. I do have some soups that I use the crockpot for, but this one today is simmered on the stove. If I weren’t retired, I wouldn’t be making it. It isn’t too time consuming, but tastes like it sat on the stove all day long. I found the recipe in a magazine years ago, and really tweaked both ingredients and steps to suit me. That’s how you make a recipe your own, you know. That said, here’s my recipe for Savory Chicken Tortellini Soup:
- 4 cups chicken broth ( I always have extra in case it needs more broth at the end)
- 4 cups beef broth
- 6 boneless skinless chicken thighs
- 4-5 medium carrots, sliced
- 2-3 celery ribs, sliced
- 1 medium onion, chopped
- 1 envelope dry onion soup mix
- 1 1/2 tsp. dried parsley flakes
- 1/2 tsp garlic powder
- 1/2 tsp crushed red pepper flakes
- 1/2 tsp poultry seasoning. ( I was out so I substituted 1/2 tsp thyme)
- 1/2 tsp pepper
- 2 1/2 cups frozen cheese tortellini
In a stock pot bring the broths to a boil. Reduce heat and add the chicken, poach uncovered for 25-30 min or till thermometer reads 170*. ( or like me, just cut open a thick piece to see if it’s cooked thru! ). Then remove chicken and set aside to cool. Add carrots, celery, onions, soup mix, parsley, and seasonings to broth. Bring to a boil. Reduce heat, cover and simmer for 10-15 min or till veggies are tender. Meanwhile, trim and chop the chicken to your liking, adding it and tortellini to the soup. Simmer on low just till the tortellini are cooked thru. Now, when I made this the first time it really seemed to lack broth. If you want to add more and it’s cold from a can than pour it right into the pot. If you use bouillon or granules and boiling water, wait until that’s cool to pour it in. You don’t want to cook the tortellini any more. We always put some shredded mozzarella over the top before serving. It’s such a hearty soup, and with a nice Portuguese roll from our local bakery it satisfied us completely! I look forward to hearing about your time in the kitchen with these recipes. If you have a recipe to share with me please do so! Here’s a quote I found that I like to think describes my family in the kitchen and around the table… “Laughter is brightest in the place where the food is.” Irish proverb
Till next time!
Tina
October 30, 2015 – Family Dinner: Easy Moo Shu Pork
Family Dinners started many years ago when the kids started to spread their wings and we saw less of them than ever. I needed a way to maintain the physical closeness. I am a true believer that “absence makes the heart grow fonder”, but my heart was longing for the love and laughter around the table of yesteryear. The kids brought their boyfriends and girlfriends, and eventually their spouses. While the people may have come and gone, the traditions live on. With Jamie, Mel and Jake in Florida, my table will rarely be complete now. But Kyle, Amanda, and Baby Gould, and Adam, David and I, will carry on and include them as if they were here. I keep saying now that we have a grand baby we’ll have to take advantage of Face-Time. We will! But for now let me share with you my yummy version of Moo Shu Pork. I’ll make them try anything! It’s great because it’s rolled up in a soft tortilla and eaten like a burrito. So if it’s one of those informal, eat in the living room dinners, it’s ok. Just bring lots of napkins! And to clarify: to me, Dinner and Supper mean the same thing. It’s that last meal of the day that you eat. But to me Dinner connotes formality ~ like a Thanksgiving meal at the dining room table. Using your best china passed down from Aunt Ellen. Supper is an informal event ~ eaten at the table or in the living room while watching a movie or simply talking and laughing. But that’s the commonality ~ laughter. I don’t know about your family, but I hope you all enjoy each other so much that there’s lots of laughter! And always, great food. Easy Moo Shu Pork
- 12 oz boneless pork loin chops (that’s about 6 good sized ones but a couple more won’t make a difference) – cut into thin strips
- 1 tbsp vegetable oil
- 2-3 cups button mushrooms, sliced
- 1/2 c sliced green onions (scallions – I didn’t realize this till a few years ago!!)
- 4 c shredded cole slaw mix with carrots
- 2 tbsp soy sauce
- 1 tsp toasted sesame oil*
- 1/8 tsp crushed red pepper
- (8) warmed tortillas, whichever size you like – I warm them for a couple of minutes in the microwave
- 1/4 c hoisin or plum sauce*
(*you can find these items in the Asian food section of your market.) 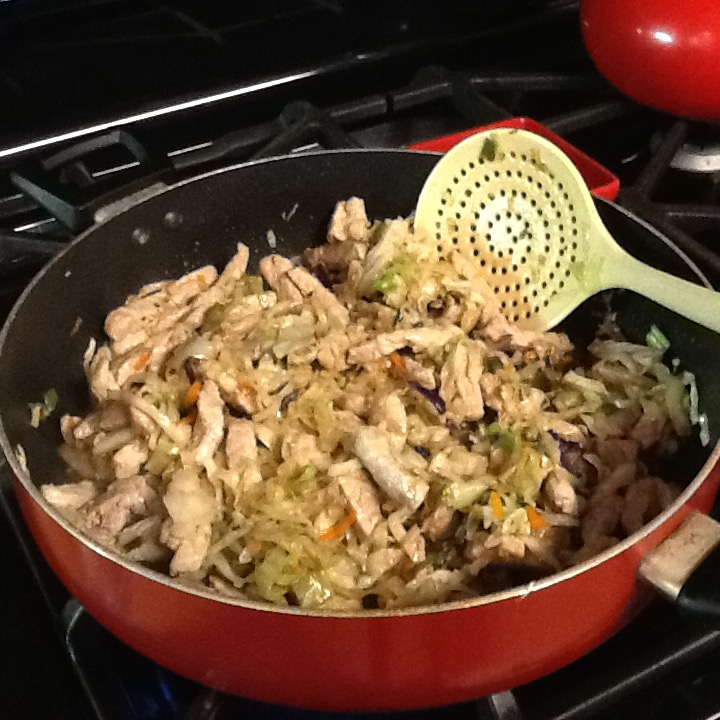 Heat the oil in a large skillet on medium-high heat. Add the pork and cook for 2-3 minutes or till slightly pink in the center. Remove and set to the side. Add the mushrooms and scallions to the skillet and cook till mushrooms are tender, about 3 minutes. Add coleslaw mix and stir for a minute or so till cabbage is wilted. Return the pork to the skillet and stir in the soy sauce and crushed red pepper. Heat till warmed through. Pile the mixture onto the warmed tortillas, roll up – ( this part took me lots of practice…) and serve with the hoisin sauce. When I serve this for a supper it’s fun to put the mixture, warmed tortillas, and sauce out and let the family make their own.
 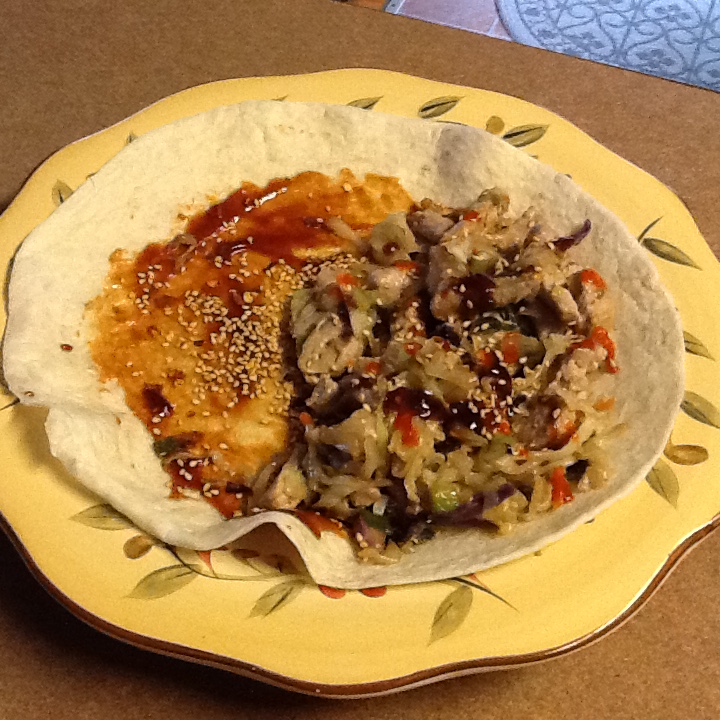 On my photos you’ll also notice sesame seeds that I’ve toasted. I think they’re yummy so add them if you think so too!
 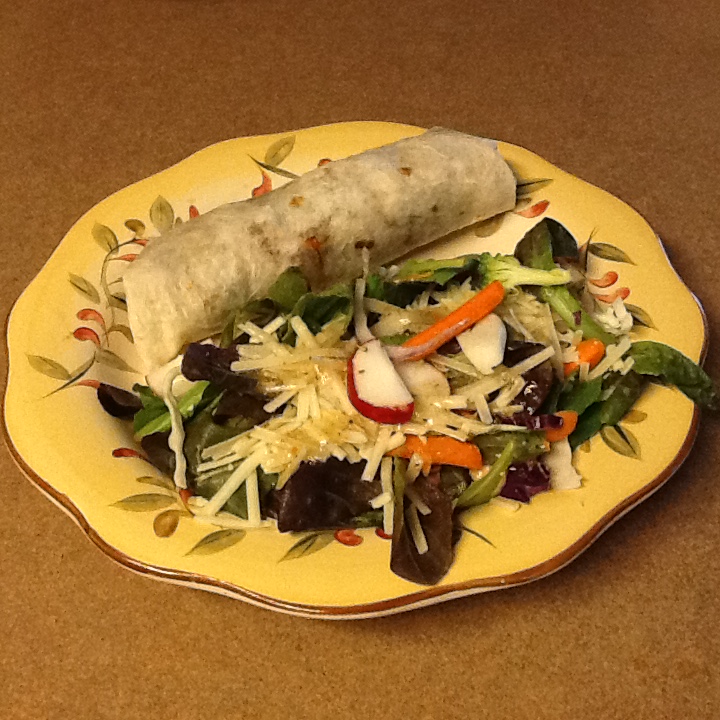 I’m happy to feed my loved ones and there’s nothing that gives me as much pleasure as spending the day in my kitchen preparing for their arrival, and a few hours of eating and sharing our time together.
Till next time!
Tina
September 24, 2015 – Lunch Box Cookies, Part 4: Razz-Ma-Tazz Bars
It feels like Autumn has arrived in Southern New England! The leaves on the trees have just begun to turn, kids are back in school; but one really knows the season is changing when you wake up in the morning and have to don a sweater to go outside – the middle of the day feels like June – and when you go to bed you need an extra blanket. I’ve got a few more Lunch Box treats to share with you before I move onto my Fall Family Dinners. The kids still need something sweet before they go out for recess. And when they get off the bus a little square of this week’s sweet would be good with a glass of milk.  This is a recipe I found so many years ago I can’t even remember where or when! But it’s a family favorite. I’ve made it for the kids, for a shower or two, and recently for our annual neighborhood Block Party. There were none left for Adam. I told him to come! Razz-Ma-Tazz Bars Makes 16 bars in an 9×9″ pan Here’s what we need:
- 1/2 cup butter ( one stick)
- 2 cups white morsels
- 2 large eggs
- 1/2 cup granulated sugar
- 1 cup flour
- 1/2 tsp salt
- 1/2 tsp almond extract
- 1/2 cup seedless raspberry jam
- 1/4 cup slivered almonds ~ toasted
Preheat oven to 325*. Grease and sugar a 9″ pan. Melt butter in the microwave for 1 minute, then add 1 cup of the morsels Do NOT stir. Beat eggs in a large mixing bowl till foamy. Add sugar and beat till light lemon colored, about 4-5 minutes. Stir in butter-morsel mixture. Add flour, salt and almond extract -mix at low speed till combined. Spread 2/3 of the batter into the pan. Bake for 15-17 min or till light golden brown around the edges. Remove and set on a wire rack. Heat jam in the microwave for 30 seconds, stir. I used a small whisk to get the lumps out. Spread jam over warm crust. Stir the remaining morsels into the remaining batter, and drop spoonfuls over the jam. Sprinkle with the toasted almonds. Bake for an additional 25-30 minutes or till edges are browned. You’ll see some good bubbling going on around the edges too. Cool completely before cutting. I suppose you could substitute the jam with a flavor of your choice, or even the nuts. The end result would be the same, deliciousness on a plate! Till next time, the way to everyone’s heart is through their stomach.
Tina
September 14, 2015 – Lunch Box Cookies, Part 3: Butter Finger Bites
 I’m back!!! And so proud (giddy is more like it!) to announce my first grandson to you, Jakob Albert Burke. Born on 8/28/15 at 9:56 pm, Jakob weighed 7 lbs, 6 oz, and was 20″ long. He and his Mommas are wonderful. It’s a new chapter for David and me. One I’m sure will involve lots of cookies!! So as I remember, I was in the midst of my Lunch Box series. And now that backpacks, soccer season, and homework are here to stay for a while, I’ll get back to some of those tasty lunch box treats. This particular cookie was born when our kids were barely school age. It was one of those Sunday afternoons where company came for an early supper, as the weekend would soon be over. Tom and Debby had their kids in tow, and our plan was to make homemade pizza as we often did on Sunday evenings. When they came in and unpacked (remember when you went somewhere with kids and had to do that?), Tom put a roll of Pillsbury sugar cookie dough and a bag of Reese’s peanut butter cups on the counter. He asked me to get out my mini muffin tins and the rest is history. He introduced us to something so quick and delicious that little did I know those two ingredients (or a version of them) would become a baking staple in my kitchen. What we conjured up that night were so good, that I started thinking about different combinations. Why not peanut butter cookie mix instead of sugar? How about brownie mix and peanut butter cups? Soon Thanksgiving passed and I was looking up my Christmas cookie list. I quickly discovered that Hershey’s made not just chocolate kisses anymore – but peppermint, caramel, cherry, and a whole bunch more to choose from! So now my options were limitless. And yours can be too. All you need to create some smiles from your favorite little ones is a couple of ingredients, and mini muffin tins. I don’t claim to have reinvented the wheel here, but I guess the trick in calling them your own is what you do with what you have. What I did last night ended up surprising even me! When I shopped I planned on getting PB cups. What I came home with were what you see here, and these turned out so good….. I call them Butter Finger Bites. So remember, the possibilities are endless, as long as your imagination is. PS: I’ll share my Christmas version with you soon enough.
 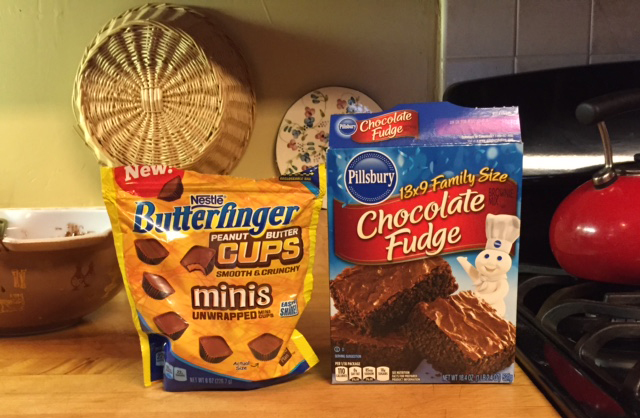 Butter Finger Bites
- I box of your favorite brownie mix 9×13 size
- 1 bag of Butter Finger mini cups
Mix the brownies according to directions on the box. Now, you either need to use mini muffin papers or spray the insides and tops of the tins, as these can be hard to get out when cooled. Bake as directed, and as soon as they come out, gently push a candy directly into the center of each. Cool and remove to wire rack. 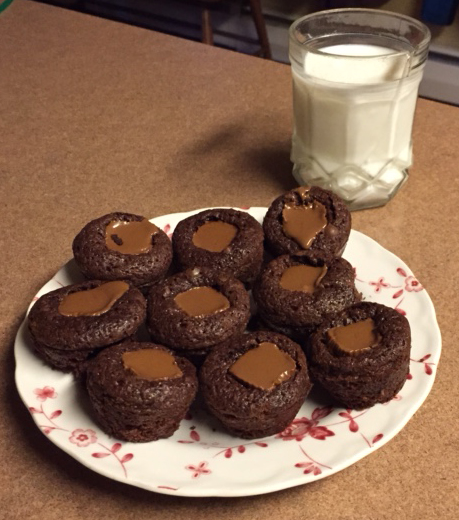 These are great for a bake sale that you hear about the night before, too! I always have a couple of brownie mixes in the closet for a quick fix. If you decide on the refrigerated cookie dough, just roll teaspoons into balls and put into the tins to bake. I surely hope I’ve inspired to you create your own treats. Please share if you do. Until next time, there’s nothing quite as precious as a chocolate-smeared smile from a little one. We have a new little boy to spoil! Remember, time in the kitchen is time making memories.
Tina
August 23, 2015 – Hiatus
Hello my loyal foodie friends, Just a note to let you know that I’ll be on hiatus until further notice, as we await the birth of our first grandson. I am down south in Tampa, and David will join the girls and I next week. Today is the due date, but Baby Boy Burke does not seem ready to enter this world quite yet. I’m patient, but Mommas are quite anxious, as I would expect them to be! Until next time, try some recipes and please leave me a comment. I like to know what’s going on in your kitchens as well as sharing my experiences with you!
Tina
August 13, 2015 – Lunch Box Cookies, Part 2: Peanut Butter Squares
To continue on my journey with Lunch Box Cookies, I’m going back in time with my sisters. It was 1979, and that was a big year for our family. You see, the three of us all got married that year! Barbara (of WildesArt), Donna (her second marriage), and myself. It was a fun, frenzied time of shopping, planning, and showers. The article in the local newspaper stated that Dad, a carpenter by trade, should probably invest in a ladder for each of us in case we decided to elope!! No problem there, he had ladders. But no one eloped. We all had beautiful weddings. 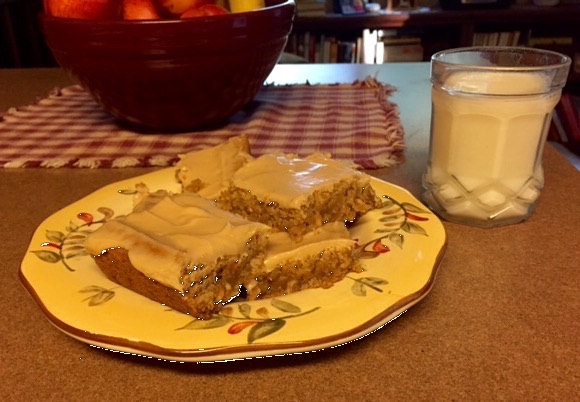 The recipe I have this week is for a delectable Peanut Butter Bar. It was passed on to Barbara from her mother-in-law, Slim, and her daughter, Cindy, and was eventually passed onto me. It went into my recipe box, tucked safely away till it felt right to make them. We believe these were served at one wedding shower or another that year. They would be great for an afternoon snack as well, or packed into a lunchbox. The recipe calls for Peanut Butter – I am a big fan of extra crunchy, so that’s what I used in the bar, but used creamy for the icing. Peanut Butter Squares Cream together:
- 3/4 cup butter or margarine softened
- 3/4 cup brown sugar
- 3/4 cup sugar
- 1/2 cup peanut butter
Add:
- 2 eggs
- 1 cup uncooked oatmeal
- 1 tsp vanilla
- 1/2 tsp salt
- 3/4 tsp baking soda
- 1 1/2 cups flour
Mix together and spread into a greased 9×13 pan. Bake at 350* for 20 min. When cool, spread with frosting: Mix together till smooth: 2 cups confectioners sugar 1/4 cup peanut butter 1/4 cup whole milk Spread over the cooled bars. As much as I love to bake, (it conjures up such memories for me), I can’t have the goodies in the house! I sent a plate of these home with Adam to share with his friends, and this morning brought a plate to a friend I had breakfast with. There’s something about sharing baked goodies. A gift from the heart goes far and wide. It feels wonderful to say, “from me to you, dear friend.” And that, dear friends, is it until next time!
Tina
August 5, 2015 – Lunch Box Cookies, Part 1: Raisin Crunch Cookies
Hi everybody! Summer is in full swing and here in New England the weatherman commonly refers to our temps as the three HHH’s – Hazy, Hot and Humid. And is it ever! Which is why I’m kind of surprised at myself for going on a Cookie Binge. Usually I’ll wait till Autumn rolls in, and the start of the school year. Making treats for home-packed lunches was my pleasure. And I was usually one of the first to volunteer to bake for a staff meeting or Bake Sale. But while looking through Mom’s old recipe box last week, I felt a stirring. The memories of Chocolate Crinkles in the oven the evening before the first day of school – the powdered sugar dusting the counter tops. I wanted to Bake! So I am. There are always neighbors to pass cookies out to. And they freeze well. Because since my children have flown the coop I rarely bake treats and I miss it. 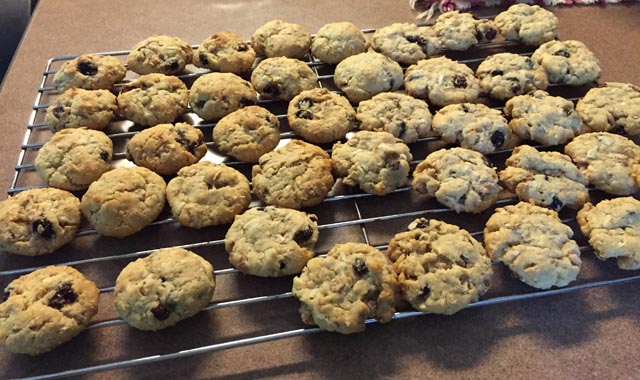 I’m starting with a sweet treat which calls for Raisin Bran cereal, but you can replace it with any flaked variety – ( Honey Bunches of Oats)… “Raisin Crunch Cookies” became “Lunch Box Cookies” after I tweaked and fiddled with the original recipe a bit. My picture doesn’t do them justice. We were on our way to a picnic when I was packing them away to take with us. Try to imagine a pile of them on a plate, next to a cold glass of milk. Mmmmmmm…… Lunch Box Cookies
- 1 1/4 cup flour
- 1 tsp baking powder
- 1 tsp baking soda
- 1/2 cup old fashioned or quick-cooking oats
- 1/2 cup ( 1 stick butter)
- 3/4 cup packed brown sugar ( I do use Splenda brown sugar and it works out fine)
- 1/2 cup regular sugar
- 1 egg
- 1 tsp vanilla
- 1 cup flaked cereal of your choice ( add-ins like raisins, craisins or nuts make these cookies yummier with a chewy texture)
- 1 1/4 cups coconut
- 1/2 cup raisins
Preheat oven to 350*. Mix the flour, powder, soda and oats together in a separate bowl. Set aside. Beat butter and sugar with your Kitchen Aid at medium speed till light and fluffy. Add egg and vanilla, mix well. Gradually add the flour mixture in, mixing well after each addition. Stir in cereal, coconut, raisins and mix well. Drop by spoonfuls or roll into balls ( that’s what I did this time) onto greased cookie sheet, 2 inches apart. Bake for 14-16 minutes or till lightly browned. Everyone’s oven is different so I tend to check on them before that. After a few minutes lay out on a wire rack to cool completely. I got about 40 cookies, but not all of them made it to the picnic! Now that I’m on a roll, look forward to my next entry – Peanut Butter Squares! I miss those little hands sneaking onto the counter to get a sweet. But David and I are looking forward to two grandbabies this year. So I have a feeling that pretty soon they’ll be two new little sets of hands in Grammy’s kitchen. And who knows? I may even send some home with them to put in their Lunch Boxes.
Tina
July 15, 2015 – The Stuff of Summer…. Orange Stuff
Hello from Connecticut! Summer is in full swing and so are BBQ’s, parties, and backyard suppers. Here in the Northeast, we’ve had absolutely beautiful weather. Mother Nature is on our side! We spent last week in Wells Beach, Maine, Maine, with our kids, and we couldn’t have asked for better weather. Sunny days and the ocean breezes kept us comfortably content. It’s so hard to resist those vacation temptations isn’t it? Wells Beach has seen the generations of our family, and continues to as our children will visit with their children for years to come. It’s a place of memories, and of course, favorite food spots! Lords Lobster, The Scoop Deck, and Forbes on the Beach, to name a few. And I’m sure that if I could talk to any of you, we’d have some memories in common. 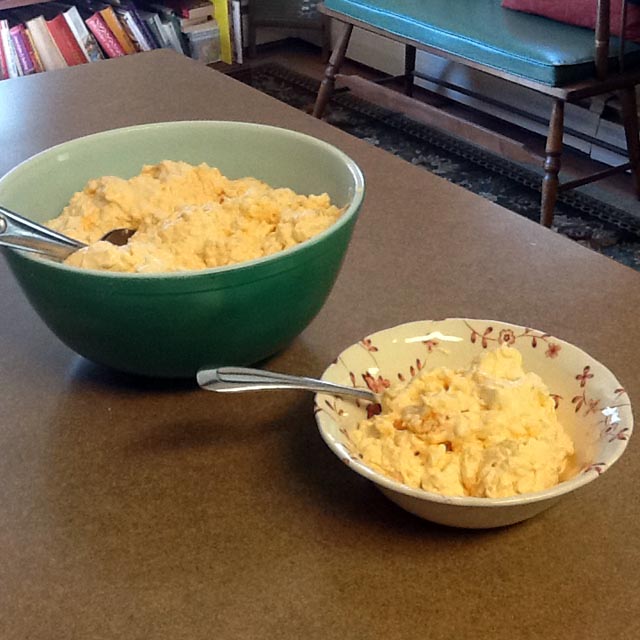 My recipe this week is handed down to me from my Fairy-Godmother, Aunt Mary. You’ve “met” her before. Remember Janis’s Party Wings? This is a fruit salad of sorts, a side dish, to pair with any Summertime menu you could dream up. My sisters and I were much younger when she first brought it around to a gathering. It was cold, yummy, and orange. And so, it was lovingly named ~ Orange Stuff!! So for the last, oh, 30+ years, Orange Stuff is a staple at most of our Summertime gatherings. And if it’s not there, I hear about it! So thanks, Aunty, for the dish, and the memories. ❤️ Orange Stuff:
- 2 lbs Cottage Cheese (I prefer small curd)
- 1 lb Cool Whip
- 1 large orange Jello ( I use sugar-free made with Splenda)
- 1 20oz can of crushed pineapple, drained
- 1 can mandarin oranges, diced and drained ( either small or large size works)
Here we go, simple and quick!! 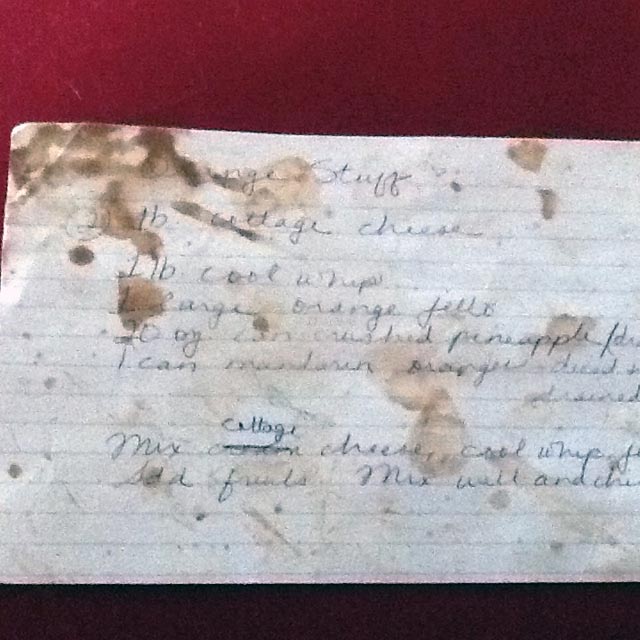 Mix the cottage cheese, Cool Whip and Jello. Add in the fruits. Mix well and chill. You can’t go wrong with this one. And don’t forget to save the fruit juices to add to that pitcher of lemonade or whatever you have cold in the fridge. I promise more Summertime fun foods to come. Until then, enjoy your food and families. Summer will be gone in the blink of an eye!
Tina
June 9, 2015 – Kielbasa and Kidney Beans
Howdy folks! When I throw together this tasty supper I’m reminded of Adam at around 4-5 years old. Whenever I was busy in the kitchen he’d like to pull up his step stool to the sink and do this activity he called “Mix”. He was the child who could so easily entertain himself by watching ants, making a river with the run-off from the garden hose, or in this case, Mix. We would go through the spice cupboard and the fridge, and I would pull a bunch of items that I didn’t mind him pouring and sprinkling into the sink half filled with water. He would mix and stir, and mix and stir, sometimes taking a half cup measure and dumping that into another container. He would dump and pour, along side me as I was preparing supper. And we would talk. About daycare. About Kelly – (our dog). And about whatever came to mind. I miss those days a lot. But when he comes over for supper he’s usually right back in the kitchen, all these 25 years later, either sautéing green beans or tasting something to tell me what it needs. My recipe this week is about dumping and mixing. And as always, it’s super easy and super yummy.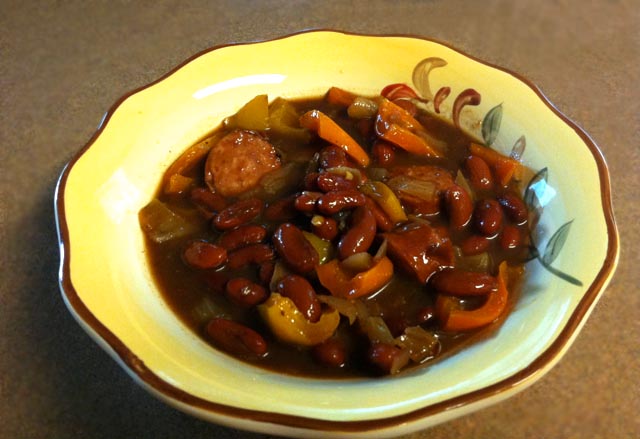 Kielbasa and Kidney Beans:
- 1 lb fully cooked kielbasa sliced into 1/2″ pieces
- 1 onion chopped
- 1 cup red or yellow peppers, roughly chopped
- 1/4 c packed brown sugar. (Splenda works fine)
- 2 tablespoons steak sauce
- 1 tablespoon cider vinegar
- 1 teaspoon Worcestershire sauce
- 1 can of beans of your choice – (I like cannelloni or large kidney) drained
Cook the kielbasa in a skillet sprayed with cooking spray for 2-3 minutes. Stir in the onions and peppers. While sautéing, dump the rest of the ingredients except for the beans together and mix well. Pour mixture over the kielbasa and onions and peppers, stirring lightly. Add in the beans and continue to heat till warmed through. I served this with a green salad and some corn bread. Delicious. Cooking conjures up lots of sweet memories for me. My cookbooks have torn and tattered, stained pages of favorites that are revisited often. The dog eared top corners tell me that the food I make will more than likely bring me back to a time gone by. May your cooking give you this sweet pleasure too!
Till next time,
Tina
June 2, 2015 – Janis’s Party Wings
Hello Folks!! If I told you that all you needed to make these delicious party wings, (or drumsticks ) were these 7 items, would you try them tonight? Well, even if you didn’t, I’m sure they’ll make an appearance at a picnic or graduation party at your home soon.  When I was down in Florida last month visiting Jamie and Mel, I had enough time to visit my Aunt Mary too. Now, she’s one special lady. When my Mom was ill and hospitalized on my wedding day, Aunt Mary stood in and was my Mom for the day. She and Uncle Vic ( Mom’s brother), were at every holiday while we were growing up, and there’s not much they didn’t know about us. They were best friends with Mom and Dad. So when Mom passed away all I needed to do was call, and she was there, from Florida. When Dad was so ill he needed round the clock care, and we were supposed to be on vacation, she was there. Two months later when Dad passed away, she was back. Everyone needs an Aunt Mary. I’m blessed to have mine. So when we spent time together in May we went through her recipe box. ( I’ll have to share the French Toast recipe we made together sometime!) And she shared this one with me. It’s a friend of her’s recipe and she passed it on to me. Isn’t that a beautiful thing? I promised I’d try it when I got home and it was our supper tonight. But let me explain why it’s not plated as usual. Remember, Monday nights Adam comes over to do laundry and have supper with us. And we had Levi here today so Kyle came just at the right time to pick him up.
 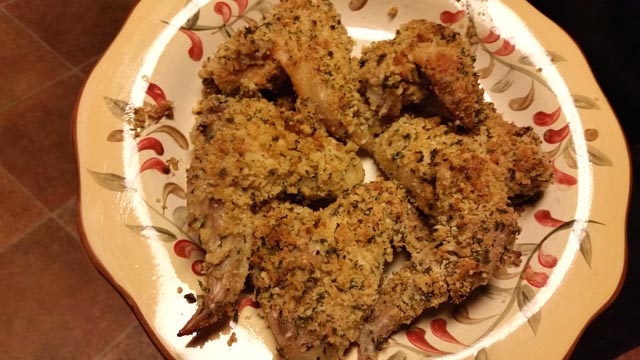 Between them, David, and the two dogs scurrying around underfoot licking up every crumb they could find, if I didn’t take the shot right on the plate I wouldn’t have gotten one! All’s well that ends well, because it was a hit with the boys…. and the dogs. This coating was enough for 2 1/2 pounds of wings. I didn’t try it with drumsticks. All you need is…..
- 2 cups bread crumbs ( I love Panko!)
- 3/4 cup grated Parmesan cheese
- 1/4 cup dried parsley
- 1 tsp. oregano
- 1/4 tsp basil
- 1 tsp paprika
- 1 1/2 sticks of melted butter
Mix up the dry ingredients – I used a big enough Tupperware to fit the wings in, and put the cover on and shook it till it was mixed well. Roll the chicken in the melted butter, coating well. Now roll it into the crumb mixture, patting it well so it sticks. Put them in a 9×13 cookie sheet, and bake at 375* in a preheated oven for 45 minutes and internal temp is 165* – or till juices run clear. I served these with a tossed salad and corn on the cob. YUM! And that’s it! I so enjoy sharing recipes with all of you. My happiness is knowing that you may make something that I’ve shared with your family and friends. I know that old saying goes, “the way to a man’s heart is through his stomach”, but I’m convinced it works on everyone. Including dogs.
Tina.
May 29, 2015 – Tina’s Teriyaki Beef
Hi everyone! I’m sitting on my front porch composing this. It’s hard to believe that two months ago we were shoveling snow here in Connecticut ! But this evening it’s lovely outside. I’m looking over my garden that I worked so hard on today, and can’t wait to see what pops up each new day. There is a tiny nest in my hanging geranium that houses two perfect little eggs. I’m careful not to disturb the family when I water it, and hope that the plant and the birds all survive this. 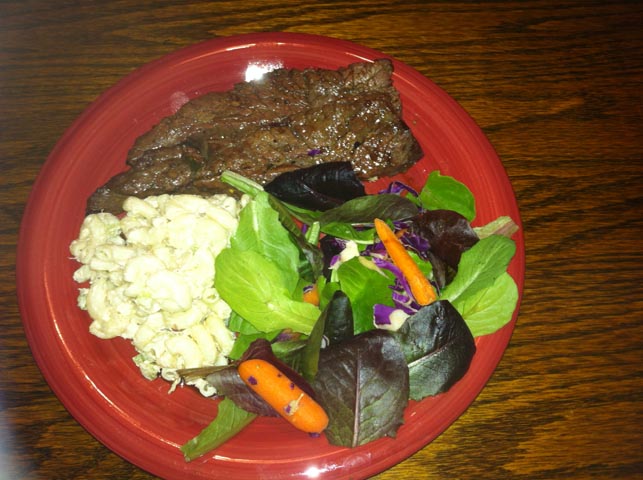 In New England this is the season we wait for. Long days, more sun, and breezy evenings spent on the front porch. It’s also the weather of cook-outs and family time. My recipe for Teriyaki Beef Tips is an old family favorite. David and I use our grill on the back deck all through the year, whether it’s a family affair or not! That was the case tonight. Tenderloin tips were on sale this week, so I grabbed a “family pack” with the idea in mind of this recipe. There’s lots leftover, but we can make sandwiches, steak and eggs, or fajitas for a few days. And if Adam stops by, he’ll warm some up and enjoy them just like that! It’s super easy, and really delicious. I hope your family and friends enjoy them as much as we do. We will need:
- 2 lbs boneless sirloin steak. ( I use tips, and only when they’re on sale!)
- 1/2 cup soy sauce
- 1/4 cup cider vinegar
- 2 Tblsp brown sugar ( I use Splenda brown sugar)
- 2 Tblsp minced onion. ( you can mince an onion or use dried, like me)
- 3-4 stalks of scallions, chopped
- 1 Tblsp vegetable oil
- 1 garlic clove minced
- 1/2 tsp ground ginger
- 1/8 tsp black pepper
What we do: If you’ve bought steaks, trim the fat and slice lengthwise into 1/2″ strips. Combine all of the other ingredients and whisk. Marinate the meat in the liquid. Now, I put the steak into two large ziplock bags, divide the marinade between them, zip up, and refrigerate all day. This morning I put them in the fridge at 8:30, and David had the grill ready to cook at 5:00. I say, the longer the better. Did I say easy? Now you decide if they’re delicious! I’m looking forward to sharing more summer-time recipes with all of you in the coming weeks. In the meantime, fingers crossed for the baby birds!!
Take care, and happy cooking!
Tina
May 21, 2015 – Tina’s Spicy Cabbage
The days are getting longer and the sun is shining warmer. That’s my signal that cookouts, picnics, and all kinds of family events are going to start being planned in the coming weeks and months. This week’s recipe is a Spicy Cabbage dish that I found, but really adapted and tweaked. Sometimes a new recipe is perfect as is. But I’ve found that mostly, adding a pinch of this or that, or fine tuning the cooking process is all it takes to call that recipe my own, and please my family. And of course, as long as it’s simple, it’ll have a place in my recipe box! So I call this: 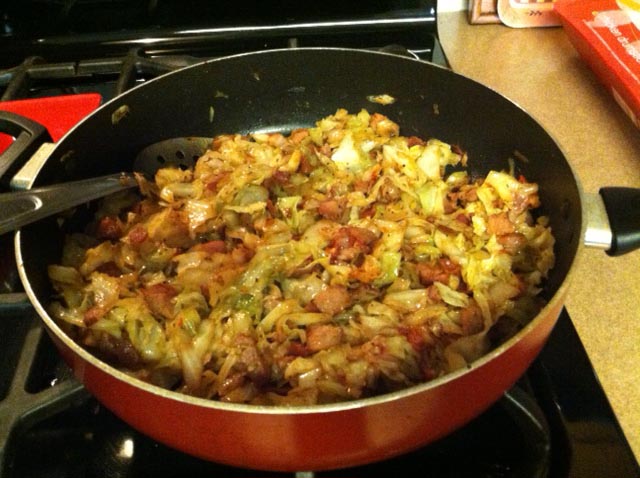 Tina’s Spicy Cabbage Makes 4 servings You’ll need:
- 1 green cabbage, about two pounds
- 1 tsp kosher salt
- 1/4 tsp freshly ground black pepper
- 12 oz package of smoked andouille sausage, cubed
- 4 strips bacon, sliced thinly crosswise ( this is tough to do without a really sharp knife. You may want to try scissors.)
- 1 chopped onion
- 2 cloves garlic, finely chopped
- 1 tablespoon tomato paste
Let’s get to work: Quarter and core the cabbage, slicing it into slivers. Toss with salt and pepper, separating the strands. Add the onion and garlic and toss some more. In a large cast iron skillet, ( or wok if you prefer – as long as it’s big!), brown the sausage, about 3-4 minutes. Set aside in a bowl. Toss the bacon slivers into the pan and cook till crisp, 3-4 minutes also. Remove from the loan with a slotted spoon, leaving the grease right there. Drain the bacon on a paper towel or two. Tumble the cabbage, garlic and onion mixture into the bacon grease, cooking and stirring over medium heat till they turn a deep, caramel brown. This took me a good 25-30 minutes. Watch for scorching and turn down the heat if need be. If you have trouble fitting all of the cabbage in the pan at one time, start with half and add the rest as it cooks down. That’s what I did. And I am going to invest in a bigger skillet now! Stir in the bacon, sausage, and tomato paste, tossing till mixed well. This is such a pretty dish! Here it is still in the pan it was cooked in. Now, depending on your family, this could be a main dish, or a side. We had it as a main dish, along with an ear of corn on the side. I suppose it would also be great on a barbecue, along with a hotdog or hamburger too. Summer events are a wonderful way to show off a new recipe. I hope you’ll try this one, it’s truly yummy. Our son Kyle, who doesn’t care for much that’s green, stopped by when we were eating. He turned down a taste until I mentioned that it had sausage and bacon mixed into the cabbage. He loved it!!!! And that’s saying something. Till next time, Keep your loved ones near with food for their bellies and hugs so dear.
❤️ Tina
May 2, 2015 – Chicken Noodle Casserole
Hi friends! It’s Monday night and we’ve just finished supper. Adam comes on Mondays to do laundry and have supper, so I need to delve into my recipe box and come up with something hearty, delicious, and worthy of a doggy-bag for him and his room-mate!!! This casserole is all of the above. And you know it’s got to be simple for a week night. I made a 9×13 pan, and was left with 2 small Tupperwares, one for us, and one for the boys. I suppose that’s a testament to how good it really is!!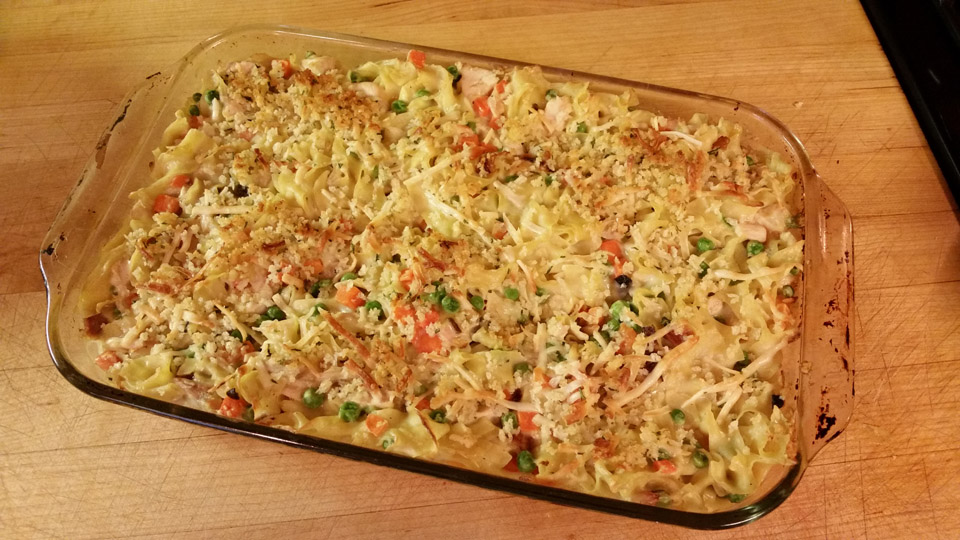 It calls for cooked chicken, cubed. I am a big fan of those yummy cooked rotisserie chickens that you can get at any grocery store now. There are many recipes that I use them for. Look at it this way; you’ve already saved yourself a couple of steps because it’s cooked, seasoned, ( this one was Bourbon flavored!) – and by the time I’d cleaned the carcass of all of the meat it measured out to 4 cups of chicken. This is a beauty to take along to a pot luck, and if you put it in two 8×8’s you can stick one in the freezer and share the other. So let’s get prepping! Chicken Noodle Casserole Ingredients:
- 1 pound egg noodles
- 3-4 cups cubed cooked chicken
- 1 can cream of chicken soup
- 1 can cream of mushroom soup
- 8 oz package of frozen peas and carrots ( the original recipe called for 16 oz of veggies but I thought it was way too much.)
- 3/4 cup heavy cream
- 2/3 cup grated Parmesan cheese
- 1/2 cup grated cheddar cheese
- 1/3 cup Italian breadcrumbs ( I use Panko)
- 2 Tblsp butter, melted
- 1 tsp garlic salt
- Salt and pepper to taste
Preheat oven to 375**. Bring a large pot of salted water to a boil and cook egg noodles to directions. Drain and set aside. In a large bowl combine soups and heavy cream, stir to mix together. Add frozen veggies, chicken, cheddar cheese, and egg noodles, and season with garlic salt and pepper. Pour mixture into a 9×13 or two 8×8 pans. Smooth it out, and top with breadcrumb topping below: Toss breadcrumbs, Parmesan cheese and melted butter, sprinkle evenly over casserole. Place dish in oven and bake for 30 minutes or veggies are tender and sauce is bubbling. Serve with more cheese if you like. We do like extra cheese, on anything! 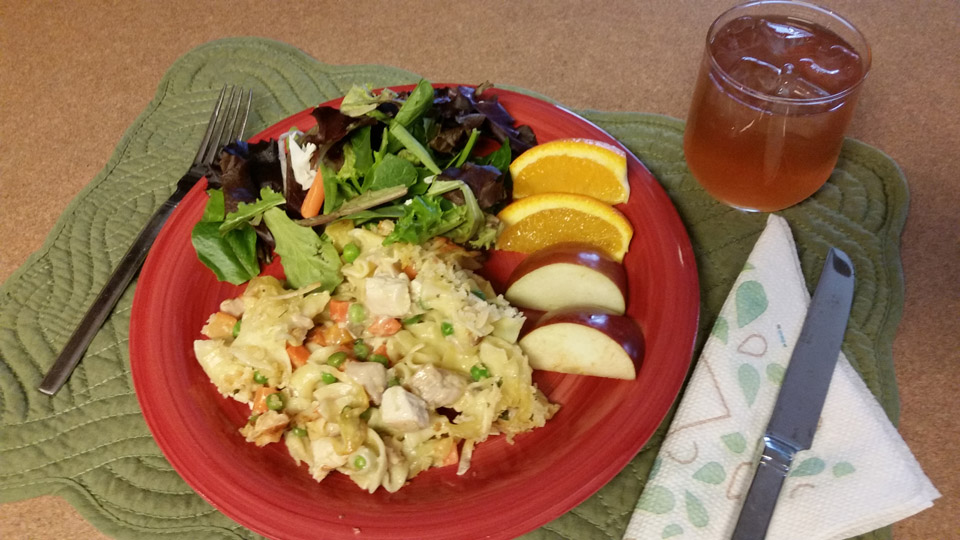 Enjoy! I love your feedback folks. And remember, in my house, food equals love.
Until next time,
Tina
April 22, 2015 – Stuffed Peppers
 Here’s a new favorite in our house, thanks to my daughter Jamie. She’s another of the great cooks in our family, and we often share recipes and compare notes. I’ve tweaked this a bit to suit our tastes, as I hope you all make these recipes “your own,” too. It’s a delicious take on what our Moms made in their day, but the time is cut in half and the end result is just as tasty! New Stuffed Peppers Makes 6 You’ll need:
- 1 pound ground beef – (Jamie would use turkey here)
- 3 tri-colored peppers – (use any color you prefer — we like the red, orange and yellow variety), sliced in half length-wise and cleaned out
- 1 can Sloppy Joe sauce, or a package of McCormick Sloppy Joe mix with your favorite pasta sauce, according to directions
- 1 chopped onion
- 1 tablespoon canola oil
- Salt and pepper to taste
- 6 slices of Colby Jack cheese (here’s where you can tweak it also)
- Scallions
Preheat the oven to 350*. Put peppers in a greased baking dish in bake for 10-15 minutes or till slightly soft. Cook the beef and drain, adding the Sloppy Joe mix. Fill the softened peppers and bake for 15 more minutes. Remove and top each with a slice of cheese, baking for 5 more minutes or till cheese is melting. Garnish with scallions. So easy, so yummy. Supper inside of 30 minutes. If you prep your peppers the night before, it really speeds things up! This is a great recipe because you can make it your own easily. 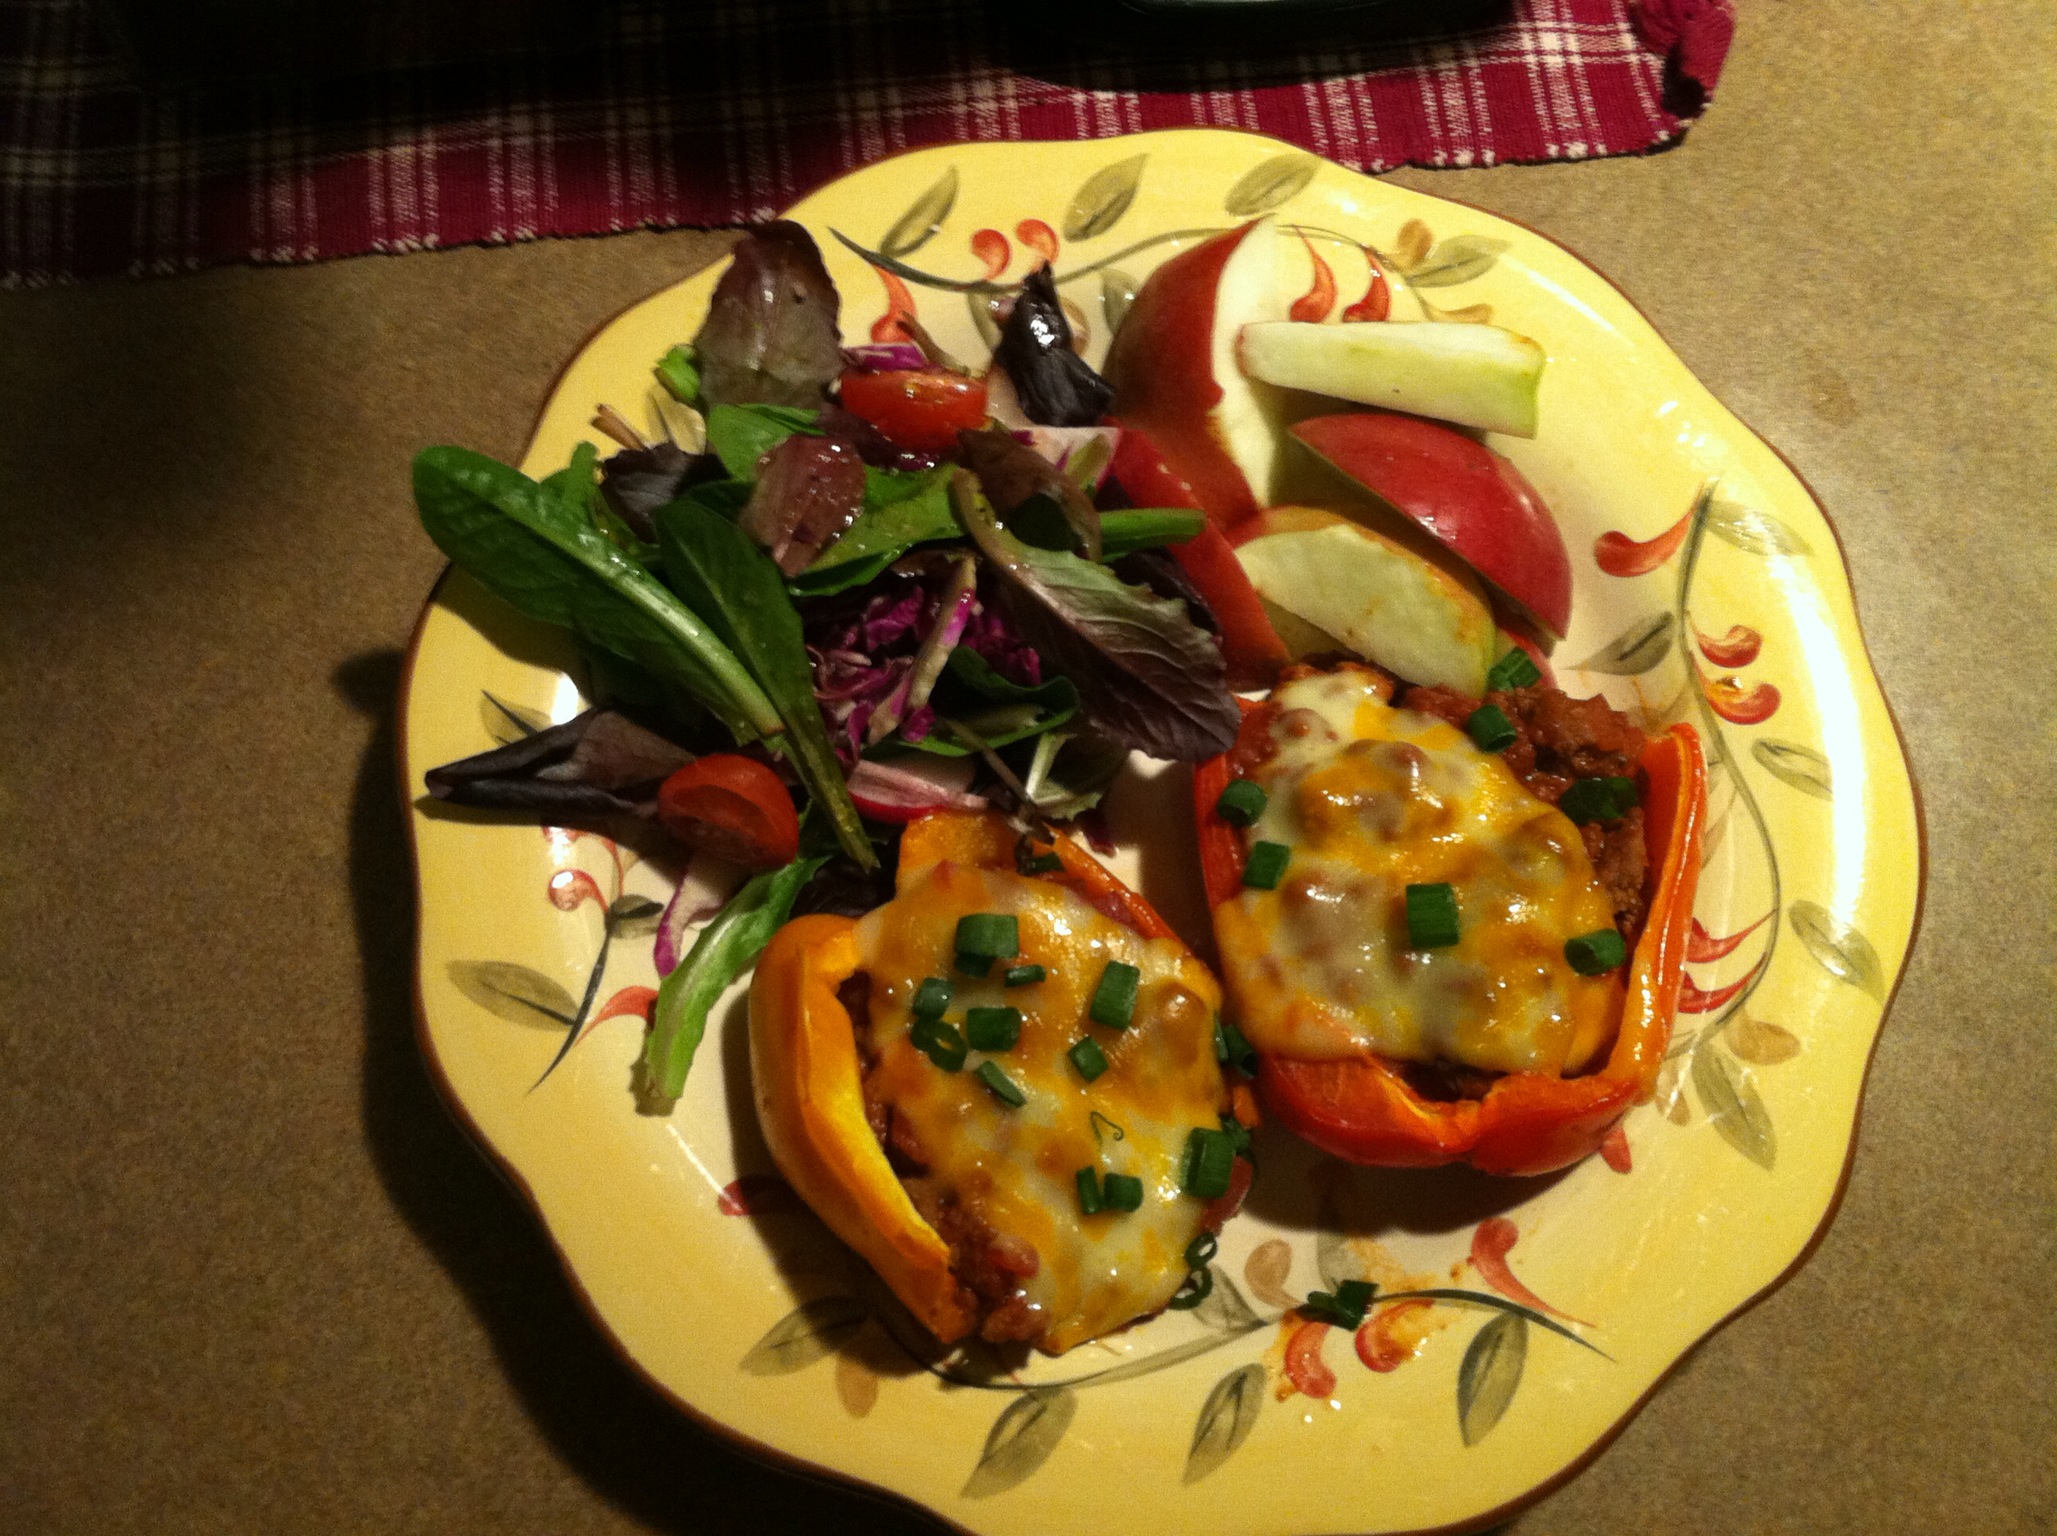 Serve with a green salad, some bakery fresh rolls, and you’ve got a healthy, new favorite in your house too!
Till next time, remember, A busy kitchen makes a happy home!
Tina
April 13, 2015 – Part 4 of The Birthday Cake Series: German Chocolate Cake
What a glorious day it was here in Connecticut! It felt good to be outside raking, cleaning up, and planning my gardens in my mind. The mid 60’s is our new 80’s!!! I’m going to offer my fourth and last birthday cake for a while, before going back to more of my comfort meals. With the warm months approaching I’ve just got so many great recipes to share. This is my daughter Jamie’s birthday cake. She is my February girl and lives in Tampa. Now, she’s an outstanding cook/baker. I’ve been telling her to start a blog but working full time and expecting Baby Boy Burke in August keeps her plenty busy. She does share with me, and it’s a Momma’s pleasure to trade recipes and secrets with her.  Her cake is German Chocolate. And I’m giving all the credit here to every cook’s best friend, Betty Crocker. I received her first cookbook as a teenager, from a dear aunt and uncle for Christmas one year. As I said once before, it was my bible. I must’ve read and looked at every picture from cover to cover, many times over. When it became so worn that it was hard to read some pages, David bought me my second copy. And, when that one had seen better days, I inherited my Mom’s two Betty Crockers. Not much has changed over the years! Thankfully her German Chocolate cake remains the same. It’s tried and true, and a Gould family favorite. If I made it more than once a year, it wouldn’t be so special. So it’s saved for Jamie’s birthday. As I said, it’s copied right from the book, so if you have it, you have it. This is one recipe where I haven’t altered a thing to make it my own, because it’s perfect just the way it is! What I did do differently was I baked it in a bundt pan. Personal preference, and when you see the picture, you might too!! Betty said it best- ” This is a grass-roots recipe that swept the country to become a classic.” German Chocolate Cake:
- 1/2 c boiling water
- 1 4 oz bar of sweet cooking chocolate
- 1 c butter or margarine softened
- 2 c sugar
- 4 egg yolks
- 1 tsp vanilla
- 2 1/2 cups flour
- 1 tsp soda
- 1/2 tsp salt
- 1 c buttermilk
- 4 egg whites, stiffly beaten
Heat oven to 350*. Grease two round or square cake pans. Line bottoms with waxed paper. In a small bowl pour boiling water over chocolate, stirring till chocolate is melted. Set aside to cool. In large mixer bowl, cream butter and sugar till light and fluffy. Add egg yolks one at a time, beating after each addition. On low speed, blend in chocolate and vanilla. Mix in flour, soda and salt alternately with buttermilk, beating after each addition till batter is smooth. Fold in egg whites. Divide batter among pans. Bake 30-45 minutes, till toothpick comes out clean or top springs back to the touch. Cool. Fill layers and frost top and sides with Coconut Pecan Frosting. Coconut Pecan Frosting:
- 1 c evaporated milk
- 1 c sugar
- 3 egg yolks, lightly beaten*
- 1/2 c butter or margarine
- 1 tsp vanilla
- 1 1/3 c flaked coconut
- 1 c chopped pecans
* ( The recipe doesn’t say to beat the yolks, but I’ve found that if you don’t first, you may get cooked pieces of yolk in the mixture as its boiling.) Combine evaporated milk, sugar, butter and vanilla in a saucepan. Cook and stir over medium heat until thick, about 12 minutes. Stir in coconut and pecans. Hand beat until thick enough to spread. Fill and frost the cake how you wish. For the bundt cake I simply pour it over the entire cake, so the outside is drizzled and there’s a pool of frosting in the middle of the cake! I hope you all own one of Betty Crocker’s cookbooks. If you don’t already, complete your kitchen by going out and getting one.
See you all next time, when I’ll be back to my regular fare. Life is more than just a bowl of cherries folks!!
Enjoy! Tina
April 2, 2015 – Part 3 of The Birthday Cake Series: Jewish Apple Cake
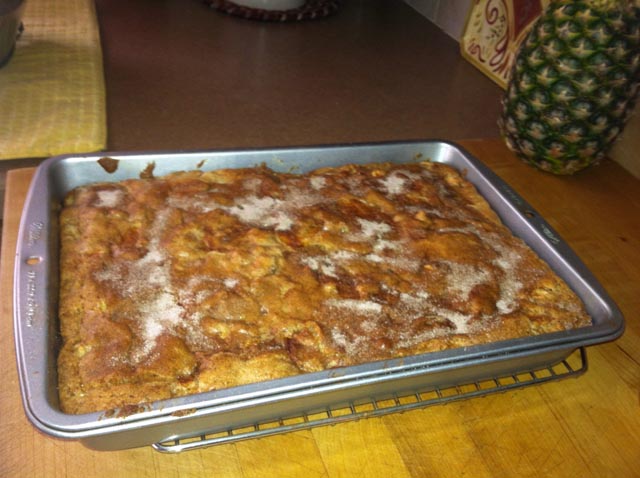 Hey everyone! I’m offering my husband David’s birthday cake this week. It’s wonderfully yummy, and one of those cakes that could be served as dessert or just as easily for breakfast. I love these recipes because after celebrating a birthday with it, I never feel guilty having a piece of it for breakfast the next morning! After my freshman year of college, much to my parents’ dismay, I took a year off. I knew exactly what I was doing; I wasn’t confused, didn’t need to ” find myself”, and had every intention of returning the year after! And I did. In fact I’ve recently retired from a 33 year stint in teaching. The key word here is retired. If I were still working, there would be no blog! The year I had off, I babysat for a nice family quite regularly. The mom very graciously shared her family recipe with me after I snagged a piece of the cake one afternoon while my charge was watching Batman. Who would’ve known that 40 years later her family cake recipe would be up on my Comfort Food blog?! Yikes!!!! Did I say 40? Years? Anyway, here’s the recipe for Jewish Apple Cake. Now a family favorite in the Gould household. Grease a 9×13 cake pan and set the oven to 350*. You’ll need: For cake –
- 4 eggs, beaten
- 1 cup cooking oil
- 2 tsp vanilla
- 2 cups flour
- 2 cups sugar
- 4 tsp baking powder
- 1/2 tsp salt
- 4 tsp cinnamon
- 1 cup chopped walnuts
- 6 medium apples of your choice, pared and thinly sliced
For topping –
- 2 Tblsp sugar
- 1 tsp cinnamon
Combine all ingredients except the apples and mix well by hand. Add apples and gently fold into batter. Pour into pan. Sprinkle the topping over the batter and bake for about 1 hour. 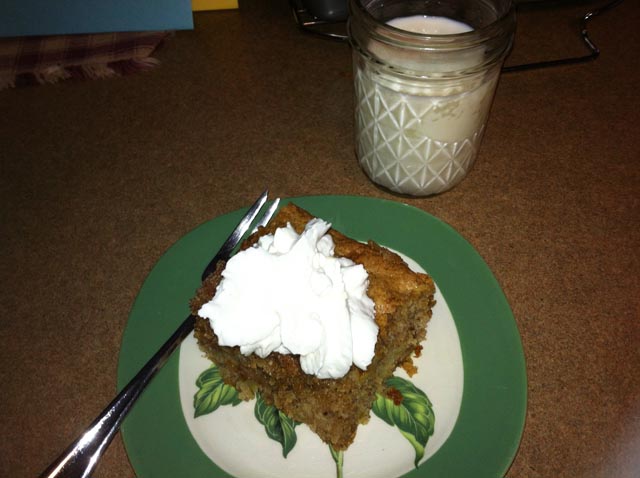 Now that’s my kind of recipe, simple and delicious!!! In our family we never serve birthday cakes without ice cream, and with this one I’d choose something like a plain vanilla bean to compliment the rich cinnamon and fragrant apple flavors. Of course, if you don’t have any ice cream on hand, a dollop of whipped cream tastes just as yummy. I hope you try this. Remember, it works just as well for breakfast, too.
Until next time, keep baking with love – for those who love you!
Tina
March 25, 2015 – Part 2 of The Birthday Cake Series: Lemon Cream Cheese Pound Cake
This is a recipe from a cookbook given to us by friends in 1992. It’s the result of the efforts of the school PTO and parents in the school community offering their family favorites combined to create a most wonderful cookbook! I’ve read, and reread it many times, trying several of the recipes myself. But the one that has kept me opening to page lll since 1999, is Lemon Cream Cheese Pound Cake. 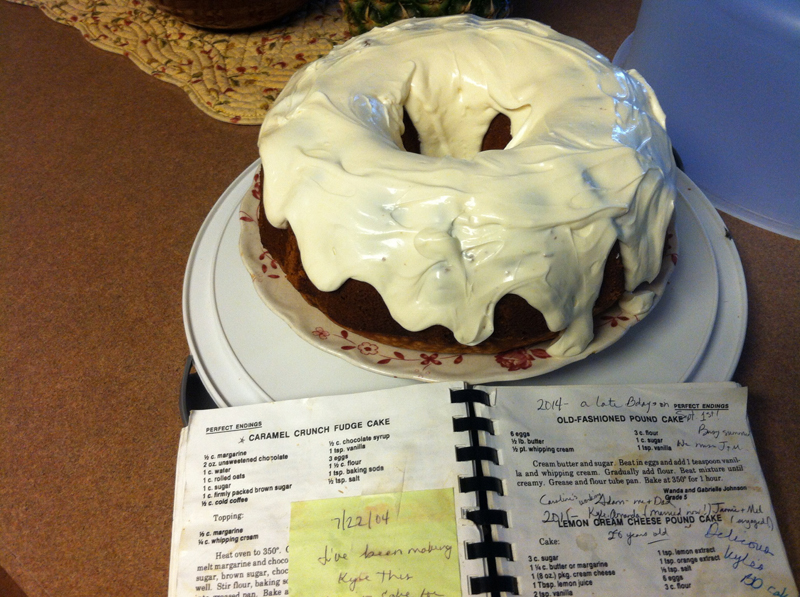 It’s been our son Kyle’s birthday cake since he was 16 years old. He’s 32 now. And in July, I’ll be making it again. Considering I’ve been baking it for him for half of his life….. Wow, I just realized that!!! Tradition is the glue that holds this family together, as you can see from the pic I took of the page. Here we go: Lemon Cream Cheese Pound Cake From: Too Busy To Cook – Recipes for Busy Families – Little Harbor School Cake:
- 3 cups sugar
- 1 1/4 cup butter or margarine
- 1 (8oz) pckg. cream cheese
- 1 Tblsp lemon juice
- 2 tsp vanilla
- 1 tsp lemon extract
- 1 tsp orange extract
- 1/8 tsp salt
- 6 eggs
- 3 cups flour
Glaze:
- 1 cup powdered sugar
- 1 Tblsp butter or margarine
- 2tsp grated lemon peel
- 2-3 Tblsp lemon juice
Beat sugar, butter and cream cheese till fluffy. Beat in flavorings and salt. Add eggs one at a time, beating well. Add flour, beating till smooth. Bake in greased and floured tube or bundt pan for 1 1/2 hours at 325*. Cool before removing from pan. * Watch this one carefully. The outside will appear browned and done while a toothpick still doesn’t come out clean. I think that’s the nature of a true Poundcake. For glaze, combine all ingredients and mix till smooth. Frost when cake is completely cool. 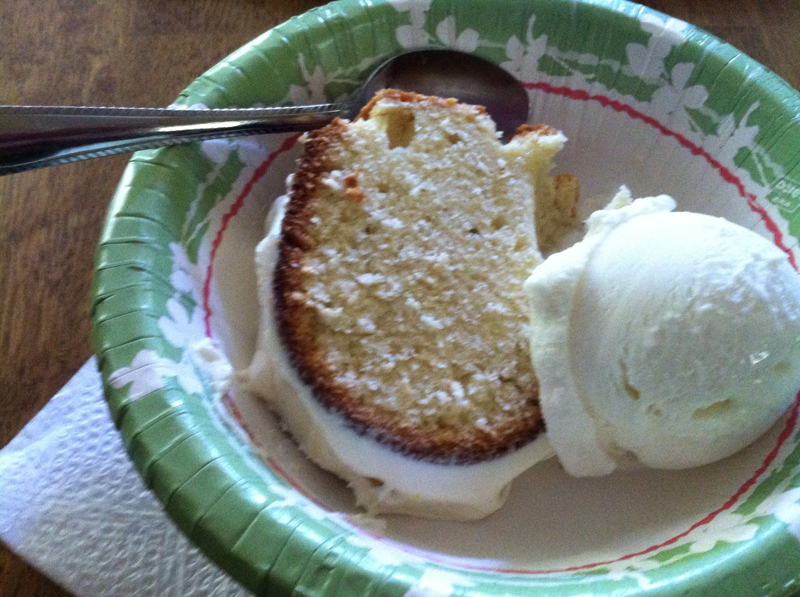 It’s so yummy. If you’re a lemon lover like Kyle is this may become a family favorite for you too!! I love reading your comments.
Stay tuned for Part 3 of the Birthday Cake series, next time.
Tina
March 3, 2015 – Part 1 of The Birthday Cake Series: We All Scream for Ice Cream Cake!
Hi friends! Well, it’s March, and it’s snowing. Seems like every time I write, that’s what it’s doing outside. Hopefully this small storm and the one we’re getting tomorrow night will be IT! I’m ready to say “Goodbye Winter!” 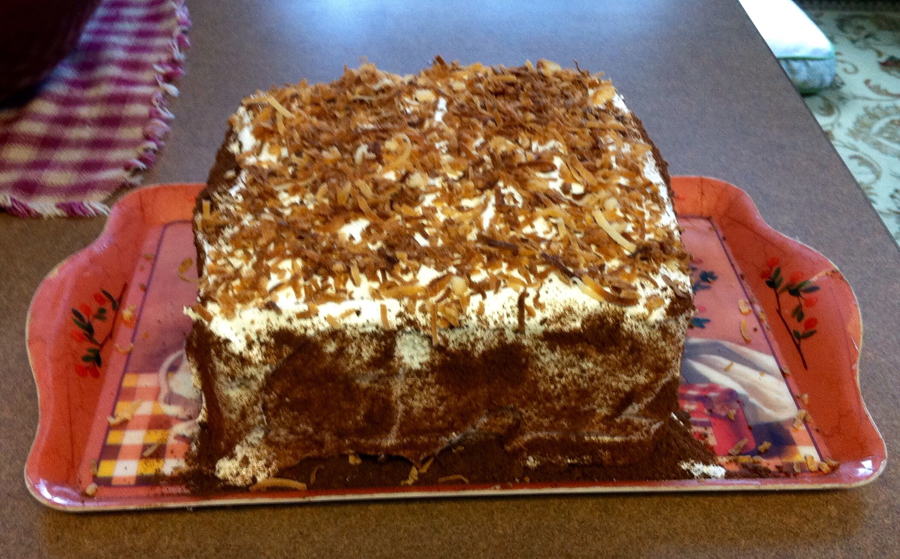 We need something fun and uplifting, don’t we? And I can’t think of anything happier than a Birthday celebration! The best part being (besides the presents), the cake!!! In our family, everyone has their favorite cake, which I faithfully and lovingly make for each of them every year. I’m going to start my Birthday Cake Series with the most recent…my daughter-in-law’s cake. Amanda (Kyle’s lovely wife), celebrated her birthday on February 28th. Yep, she’s our Leap-Year Baby!! We always celebrated her and our daughter Jamie’s birthdays together – (Jamie’s is February 23), but since Jamie and Mel have relocated to Tampa…… Well, you know the rest. This year, Amanda asked for an ice-cream cake. Her request was chocolate/chocolate, but I asked if we could do half of the ice-cream vanilla, which was fine. It was so easy, I debated even putting it on the blog, but sometimes sharing something that’s so easy and from the heart is just as wonderful. So here we go: Chocolate and Vanilla Ice Cream Cake Make your favorite chocolate cake recipe. (Or use a box mix. Hey, everyone has a couple on hand!!) And use two 8×8″ square pans if possible. If you don’t have those, you could use a 9×13″ and cut the cake in half later. I was lucky enough to inherit most of my Mom’s great sturdy bakeware. After the cake is cool, take your cartons of ice-cream and slice as thick as you prefer, laying them on top of the bottom layer, fitting and molding them as best you can to the cake. You can use a layer of wax paper under your hands if it’s easier. Put the top cake layer on, and with a knife, smooth out the ice-cream on the sides. We like to use Cool Whip to frost the cake. I kept mine in the fridge after I bought it, and it’s a perfect consistency for icing the cake. As far as decorating? David (my husband and partner in the kitchen) got very creative, I must say. He pulverized chocolate Teddy Grahams (!) and coated the top and sides with them. Then, I (a lover of coconut on everything) suggested toasting some and sprinkling that over the chocolate! After all is done, pop it back in the freezer and take out 10 minutes or so before serving. The end result was, I must admit, gorgeous. The taste, incredible.
 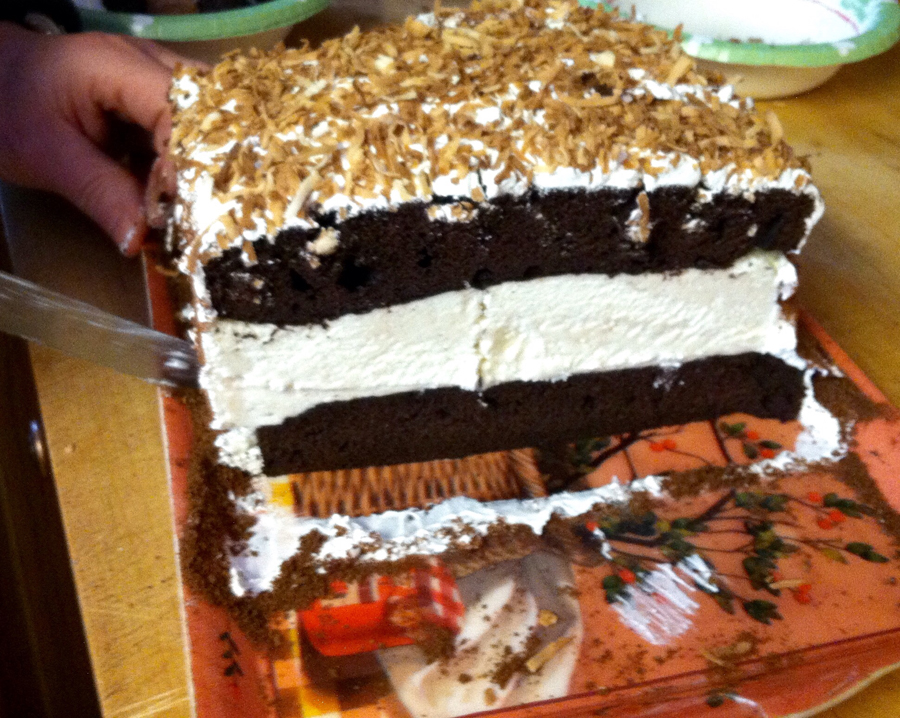 So you see, to get a cake that looks Bakery made, with very little effort, can be done!! And think about the possibilities for flavor combinations. The picture unfortunately only shows the vanilla center, but you can imagine what the other side looked like! I’d love for you to try it, and let me know about your creative cake and ice-cream flavor combinations. The best part? This is a cake you don’t need to serve ice-cream with!! I’ll share another Happy Birthday cake next time…..
Until then, Happy Kitchens!!
Tina
February 16, 2015 – Salisbury Steak for Supper!
Hey Friends! Another cold, snowy weekend here in Connecticut. That’s a great reason to hang out in your kitchen and create some love. Why do I cook? When I think about it, I guess one of the main reasons is to bring my family together. When it’s just David and me here, we rarely use the dining room table, but settle into our spots in the living room and watch TV. Now, ask any of my kids, and they’ll tell you that growing up, the TV wasn’t even on, never mind eating in the living room! We sat at the table, we talked about our days, and this is where I’d like to believe that they learned manners, patience, and the ability to communicate with one another. Cooking, for me, brings my family together. Whether it’s just the kids, friends, extended family, or, at times, all of them at once. My favorite part of Thanksgiving is, after everyone is seated and I take one last look around and finally join them at the table, simply reveling in this picture of what we’ve created and made happen. I listen. I watch. I am grateful beyond belief at what we have. This week’s recipe is a favorite that brings our youngest son Adam to our table every Monday night. Mondays are supper and laundry night! It’s another one of those traditions that we live for. 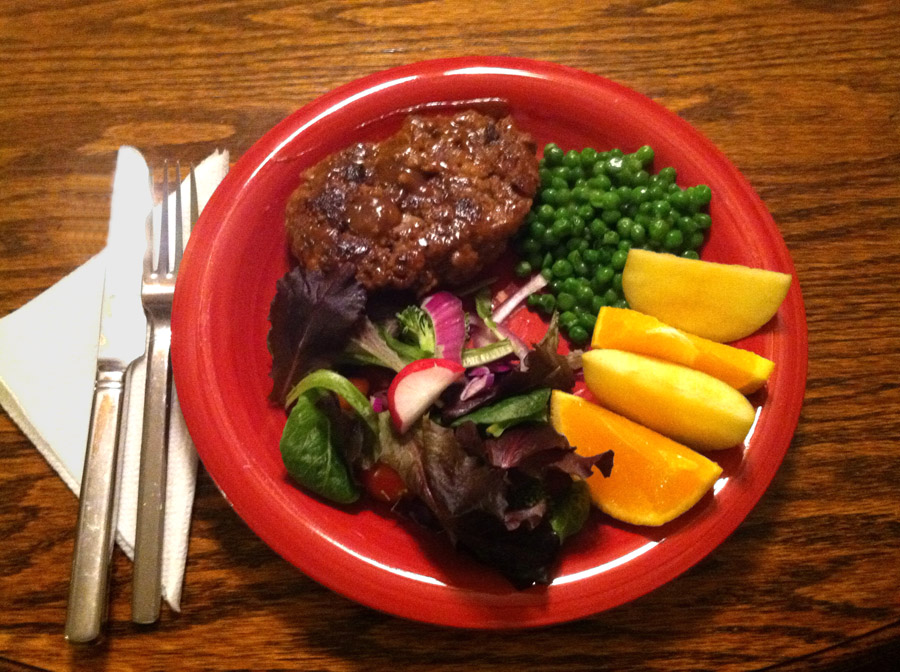 The first time I made this, David and Adam were impressed, now they’re just glad when they hear it’s – Salisbury Steak for Supper! This is so easy. It’s like making a meatloaf, but shaping it into oval patties. For 6 patties you’ll need:
- 1 1/2 lbs of ground beef
- one 6 oz package of stuffing mix for chicken
- 1 large onion, chopped
- 1 egg
- 1 cup water
- Scallions, chopped or cut with scissors, about 1/4 cup
- Canola oil
- Favorite brown gravy recipe or mix
Mix all ingredients except the scallions. Use a potato masher if you don’t like to get your hands in it, but I prefer to feel it blending together. Shape the mixture into 6 oval shaped patties, don’t flatten out too much. Heat about 1 Tblsp of oil in a skillet, and add the patties. I do 3 at a time so there’s plenty of room to turn them. Cook about 5 minutes on each side. Temp should be 160* and they should be nice and browned. Put them all in the pan now, and pour your gravy over them. Simmer, covered, for about 5 minutes or so. Before serving, sprinkle each with a few scallions to top them off. The end result is delicious, and hearty. Here you see my Salisbury Steak, served with a green salad, green peas, and orange wedges. If you’re wondering why there’s never a starch on my plates, it’s because David and I rarely indulge in potatoes, rice, pasta…. health reasons mainly. I know you’ll feel free to have whatever sides you like!
Until next week, stay warm – and loved,
Tina
February 9, 2015 – Chicken Scallopini
Happy Sunday Everyone! Another snowy day here in Connecticut. I hope that wherever you are you’re warm and cozy. My recipe this week is for a really tasty main dish – Chicken Scallopini. It’s one of those recipes that my family loves, and when I’m standing in front of the fridge in the morning with no plans on how to use the chicken breasts that are in there, it pops into my head – “That’s it!” It’s quick and easy, with a few steps, because I’m all about good, simple suppers. And I’m retired! You can prep the chicken (butterfly it), store it in a container the night before, and very easily whip it up when you get home from work. Here’s what we need: Makes 12 chicken cutlets
- 6 boneless-skinless chicken breasts – (If they’re thick, I butterfly them, meaning slice them horizontally so you have two thinner pieces.) If they still seem thick, flatten them between 2 pieces of wax paper with a mallet to desired thickness. It’s all about personal preference.
- 1/2 cup flour
- 1/4 tsp salt
- 1/4 tsp pepper
- 2 eggs
- 4 Tblsp water
- 2 c bread crumbs – I love Panko for that extra crunch, but any type will do.
- 2 c grated Parmesan cheese
- Olive oil for frying
Here’s the Plan: You’ll need 3 separate shallow bowls, ( I use 3 round cake pans) – and you’ll combine the ingredients as so, for dipping: 1st: flour, salt and pepper, mixed lightly 2nd: eggs and water – beat the eggs up with a fork 3rd: bread crumbs and Parmesan cheese, mixed lightly I very often find when I’m coating something to cook it, that I need to keep adding a little more of this or that to one of the pans. If you throw in more flour, make sure you compensate with the breadcrumbs too. Same for the other mixtures. Now take the chicken and dredge it in pan #1, shaking off the excess. Next dip in pan #2, the egg mixture. Finally get over to bowl #3, and press the chicken into the breadcrumb mixture till well coated on both sides. By now you should have about 12 pieces of chicken on a sheet pan, ready to cook in your skillet. Heat about 2 Tblsp of Olive Oil in the skillet. I like a non-stick rather than a cast iron for this one. Cook the chicken for about 3-4 minutes on each side, or till juices run clear. You’ll need to do this in batches, because you’ve got a lot of pieces here. And the reason they’re on the cookie sheet….. they’ll be warming in an oven of 350* as you cook the rest. When they’re all cooked and warmed in the oven, you can sprinkle some minced parsley on top before serving. 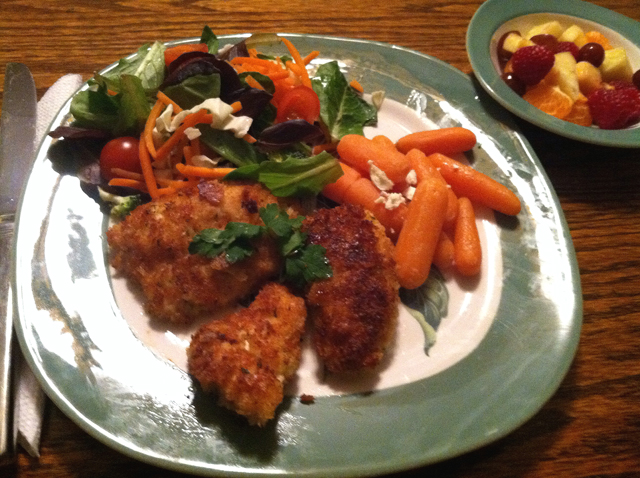 My plate shows the chicken, a simple green salad, cooked and buttered carrots, and a side fruit salad. I was going to serve broccoli, but thought the color of the carrots made a much prettier plate. There’s usually a lot left over, since there’s just the two of us now. But it’s great as a leftover meal, or I’ve even cut up the chicken cold and added to a green salad for lunch! I always buy boneless chicken breasts in bulk, and portion and freeze the extra for later use. I hope you try this, and let me know how it turns out. Till next week,
Happy Cooking!
Tina
February 2, 2015 – Stromboli
Hey Folks, and Happy Super Bowl Sunday! No matter which team you’re rooting for, and even if you’re just there for the food and company -(me!!), you’ll look forward to some good eats. Our contribution tonight is an old favorite in our family made by my husband David. He was a chef in another lifetime, and still loves being in the kitchen whipping up party fare for family shindigs. I believe Stromboli evolved from the days when the kids were small, and we made up a Sunday night ritual called ” Pizza Fires”. Daddy was in the kitchen for hours, usually with one or more little ones under tow, making his famous homemade pizza. He usually made three kinds, and of course,there was a fire in the fireplace. We used paper plates and cups, and camped out on the floor and watched the fire while we ate. Mmmm…. What a tasty, love-filled memory. Now, there’s always one in the bunch who wants something different, and when it’s the baby, we tend to cater a little more to their needs and wants, am I right? Adam (our baby), had experienced Calzones somewhere, so Daddy lovingly made him his own personal Calzone with his favorite fillings. The others never minded, they loved pizza, and it’s very easy to take a smaller piece of dough, stuff it with fillings, fold it over, and press it shut. Stromboli evolved from here because we were looking for an alternative to bring to an event. Something that would travel easy, could be sliced, and eaten hand held like a slice of pizza, using all of the ingredients as in a pizza. Kind of a grown-up version. It’s been made for many family parties, and even for a staff party at my school.  I’m very blessed to have landed a man who enjoys cooking and is really great at it! I can always count on him to step up when the going gets tough, or there’s just too much for me to do by myself. My advice to all you young girls out there? Look for a guy who’s very familiar in the kitchen. It’ll pay off, in more ways than one! Ok, you will need: for three Strombolis:
- 1/2 lb sliced ham
- 1/2 lb salami ( sliced, your choice)
- 1/2 lb provolone sliced
- 1/3 lb each of American and Mozzarella, sliced
- Onion and garlic powders
- Italian seasoning
- 3 frozen bread doughs
- Baguette (bread) pans- if you don’t have these you can use a big sheet pan and lay then side by side.
Here’s what we do: Grease the pan(s). Preheat oven to 350*. Roll out each dough into 12×14 inch square. Brush the edges with beaten egg. Lay out the provolone, the salami, and the American on top of the dough, and then sprinkle with onion powder, garlic powder, and Italian seasoning. Next, lay out the ham and the mozzarella. Roll up jelly-roll style, and pinch the entire dough closed, and put the seam side down on the pan. Now brush the top of the dough with beaten egg and sprinkle Italian seasoning lightly in the top. Bake in a 350* oven for 30-40 min. or until top and bottom are browned. (Of course, you can really put as much cheese or meat as you want to, it’s all about your liking.) Cool 15 min before slicing. This is delicious right out of the oven, or warmed up the next day. I admit to having even snagged a slice out of the fridge and eaten it up cold! It’s wonderful as an appy, or along side a green salad for a lunch or light supper. We make three and freeze two, using the one for a couple of meals during the week. Since there’s just the two of us here now, the others are saved to bring to a gathering, or to give to a child….. to bring home. Enjoy! Let me know if you try it and how it comes out. I love feedback.
Till next time, Happy Kitchens!
Tina
January 26, 2015 – Healthy Granola Bars
Hey friends! We all know how great it is to be surrounded by sweet treats from Thanksgiving to New Years. Then it seems as though Valentine’s Day is right around the corner, next is Easter, followed soon after by those summer celebrations that tempt us with more yummys for our tummys. It never ends. My sweet tooth is as big as the next guy’s, but I know that at least if I’m baking the goods, they’ve got to be healthier than store bought. And who doesn’t love a kitchen filled with the aroma of freshly baked treats? Once in a while I’ll want a quick snack to grab while I’m on the run, and this one is perfect to take in the car, or to have with a cup of tea and a good book on a rainy afternoon. They’re super easy, and just as lovely to serve to company when they pop over, or wrap in wax paper for a lunch box. Go ahead and enjoy the sugary, decadent treats on those special days, but let’s get creative and bake healthy the rest of the year. Here we go! Healthy Granola Bars Here’s what you need:
- 2 cups of old fashioned oats

- 1/2 cup honey
- 1/2 cup vegetable oil
- 2 tbsp. water
- 2 large egg whites
- 2 tbsp. packed brown sugar
- 1 tsp. ground cinnamon
- 1/2 tsp. salt
- 1/4 cup coconut
- 3/4 cup each – toasted wheat germ, chopped walnuts, and dried cranberries.
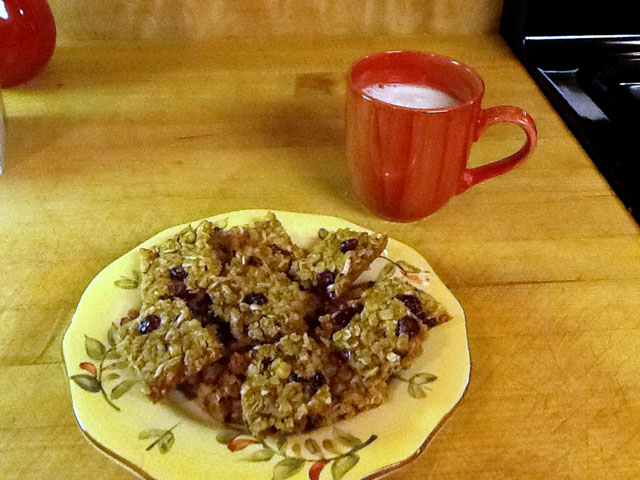
Let’s get Busy! Preheat oven to 325*. Spray a 9×13″pan and line with foil, leaving an overhang to pull out later. Spray the foil too. Spread the 2 cups of oats on a plate and microwave at one minute intervals for up to 4-5 minutes stirring occasionally, till golden and fragrant. Let cool. In a large bowl, whisk together the first 8 ingredients till well blended. I love whisking! It’s a beautiful utensil, and reminds me of my Mom and Grammy, cradling the bowl in one arm while stirring the whisk in a circular motion with the other hand while the mixture transforms like a science experiment. Fold in the wheat germ, cranberries, walnut, and coconut and transfer to prepared pan. Wet your hands to press down evenly. Bake 25-30 minutes or till golden brown and firm to the touch. Cool, then remove with foil onto cutting board. Cut into squares. Make sure they’re completely cool when you cut them, otherwise they may fall apart if they’re too warm. Actually that’s not a bad thing, it’s granola! Mmmmmmm……. Let me know if you like them! Clean up tip for the week: Clean up as you go along. I never leave the whole mess on the counter till later. And start with an empty sink. Much nicer to look at if your neighbor stops by!!
Till next time, Happy Kitchens!
Tina
January 19, 2015 – Triple Decker Mexican Pie!
When you have a craving for Mexican food, but don’t want to spend hours in the kitchen, what do you do? You make my Triple Decker Mexican Pie! 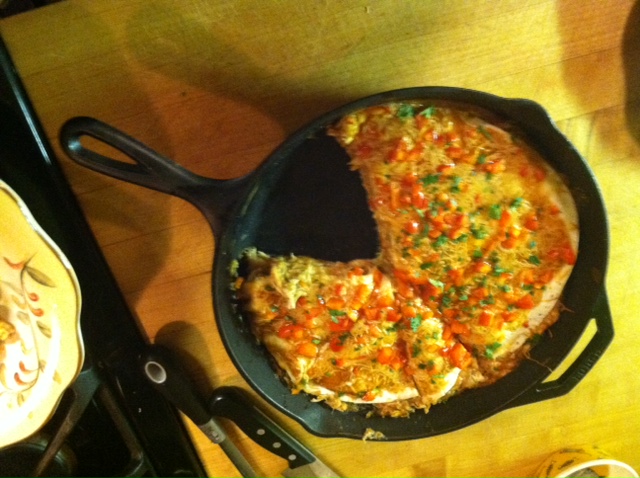 So easy and so yummy. Have a green salad on the side, some sliced apples, and you’re all set. ( Sliced apples?? Ask anyone who’s ever eaten at my house and they’ll tell you there’s always sliced fruit on the table. Whatever suits you fancy and goes with the meal I say.) This is so easy, that I’d definitely put it into my “Quick & Easy” file.
Here’s what you need:
- One rotisserie chicken
- 2)12 oz cans of enchilada sauce
- 10″ flour tortillas
- 4 oz Monterey Jack cheese, shredded
- A 15 oz can of refried beans
- Sweet red bell pepper
- Cilantro
Here we go: Shred the meat from a rotisserie chicken from the supermarket. Put into a large bowl and add one and a half cans (12 oz. each) – of enchilada sauce. I used mild, but you may prefer hot. Stir in a can 15oz. can of refried beans, and mix together well. Spray a large cast iron skillet with cooking spray, place one 10″ flour tortilla in the pan, and generously spoon and spread chicken mixture on top of the tortilla. Sprinkle some Monterey Jack shredded cheese over it. Repeat with another tortilla, chicken mixture, and cheese. Add one more tortilla over the top, pour and spread remaining enchilada sauce and sprinkle more cheese over it. Finally, sprinkle 1/2 cup of finely chopped sweet red pepper over the whole thing. Bake in a preheated oven of 450* for about 20 min., or till it gets bubbly, and tortillas start getting crispy. You don’t want them to get brown. Once it’s out on the counter and looking gorgeous, sprinkle some chopped cilantro over the top. You may prefer to put salad greens and sliced cherry tomatoes over it to dress it up.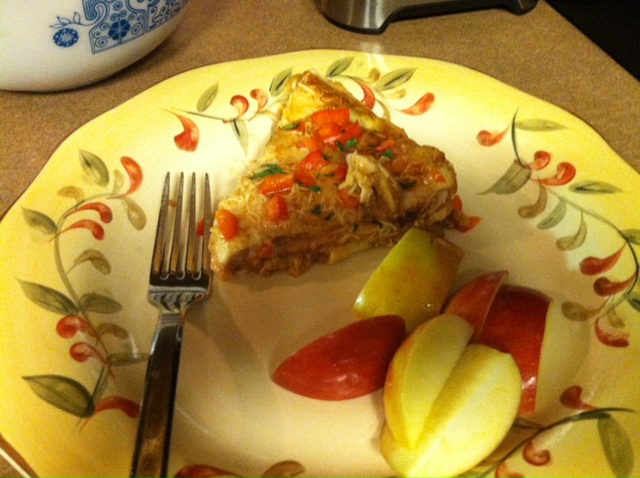 This is a great meal because there’s very little clean-up! After we ate, I put foil over the pan and stuck it right in the fridge. Let me know what you think – I hope you like it as much as we did. A happy kitchen is a neat kitchen. When I’m cooking, I open up a plastic shopping bag on the counter to throw all of my mess into. When you’re done, plop it into the garbage!
Till next time, Happy Cooking!
Tina
Tina,
I love your blog and your awesome recipes. Thank you for sharing your sister’s site with me.
P.S. Love those date bars! Yummy!!!!
So happy the boys and “pups” liked the Party Wings! I know they always went over big when I made them for many gatherings. Tears came to my eyes Tina when I read your blog! Thank you so much for a lovely tribute. I am so blessed to have you all in my life!
Tina, the Lemon Pound cake looks so good! I’m looking forward to trying this one! Just open a bakery already 😉 If I were closer I would tempt you to take orders.. Although I seldom have time to bake, this cake is going to make me get the pan and mixer out. Enjoying all these recipes.
Thanks so much Michelle! This is a true compliment coming from my sister’s new friend.
I can see these evolving into a nice, homey cookbook one day, Tina. I have a couple of cookbooks, written by Marjorie Standish, called Cooking Down East and Keep Cooking the Maine Way, that are written in this same style. I’ve used them so much that the covers are falling off; they are such a joy to read and the recipes are great. Waiting for more great recipes from you!
Thanks so much Kathy. That means a lot to me.
Enjoyed your memories shared.. what else can I say, I’m hungry!! Looking forward to trying out these recipes. Michele
Tina, I love your Comfort Food blog! I have so many wonderful memories of my mom and I cooking and baking in the kitchen. She always let me help her at a very young age, now wondering how helpful a 3 year was, yet thankful of her time guiding me through each step of her many recipes! She always let me lick the bowl; even with raw eggs in the batter! And my ready to use Easy Bake oven was a staple in my kitchen world!
I will definitely try your recipes! Thank you, what a treat!
Thanks a bundle for your sweet words Lori. I hope to be cooking some “Comfort Food” for you and Jeff, Bozz and Bill, real soon. ❤️
This sounds delicious Tina…can’t wait to try it! Thank you!
Jan and Tina, I remember Grammy’s soft molasses cookies. I used to make them for Dad as a treat at times. Grammy would make them for Dad all the time when he visited her on Sunday nights. I even have her cardboard hand written recipe with lots of flour/shortening stains on it! I’ll email you a copy Tina!
Got it Linda, it’s a treasure.
Will you share? I don’t have the recipe. They are my absolute favorite cookies–of course, the fact that Grammy baked them made them all the more special!
Yes Christine, I’ll email to you if you want, or I’ll put it up on the blog next week! Several cousins have been asking for them so I think it’s time. You can IM me your email address if you want me to do that. Thanks to Linda Hansen for reminding me of them! She sent me the original but I discovered that Mom had it too.
This sounds absolutely yummy! And I love seeing it plated! Thanks, too, for the cleanup tidbit! Hints by Heloise, look out!
Looking forward to some new/old recipes! I wish I had some of those cake recipes from Christmas night at Grammys. Remember all those cakes? So many memories!
Thanks Jan! I may be able to rustle up some of those recipes because I have ALL of Mom’s recipe boxes and cookbooks. The cake that comes to mind is the Chocolate Marshmallow one, mmmmm….. I made it once for one of Jamie’s earlier birthdays. Isn’t this the perfect way to keep our memories alive?
Looking forward to seeing what you’re cooking up in the new year!
Ahh, such fond memories Tina!